Chocolate Covered Sprinkle Cookies
This delightful recipe transforms a simple, buttery shortbread into a festive masterpiece that’s as beautiful as it is delicious. By dipping the cookies in rich, melted chocolate and showering them with vibrant nonpareils, you create a treat that’s perfect for celebrations, gift-giving, or just a bright spot in your afternoon.
A Whimsical Treat for Every Celebration
There’s something about a star-shaped cookie covered in colorful sprinkles that instantly brings a smile to your face. These Chocolate Covered Sprinkle Cookies are designed to be the life of the party, offering a satisfying crunch and a burst of chocolatey sweetness in every bite. Whether you’re baking for a holiday, a birthday, or a “just because” movie night, these treats provide that perfect bit of edible joy, and let me tell you, it’s worth every bite.
The Enduring Appeal of Shortbread and Chocolate
The combination of a crisp, buttery biscuit and smooth chocolate is a pairing that has stood the test of time across many cultures. By using a star-shaped cutter, we add a touch of whimsy to this classic duo, making it feel like a gourmet bakery find right in your own kitchen. These cookies have become a favorite for those who appreciate a dessert that looks professional but tastes like it was made with heart and home-style love.
Why You Will Love These Sprinkle Cookies
You will find that these cookies are as reliable as they are charming, making them a recurring favorite in your baking rotation.
- Versatile: These stars can be adapted for any season simply by changing the sprinkle colors or the cookie shape.
- Budget-Friendly: The base uses basic pantry staples like flour, butter, and sugar, keeping costs low while flavor stays high.
- Quick and Easy: The dough comes together quickly and the dipping process is a fun activity that doesn’t require complex skills.
- Customizable: Use white chocolate or dark chocolate, and experiment with different flavored extracts like almond or lemon.
- Crowd-Pleasing: The visual appeal of the colorful sprinkles makes these a hit with kids and adults alike.
- Make-Ahead Friendly: These cookies stay crisp and the chocolate stays set, allowing you to bake them several days before an event.
- Great for Leftovers: If you have extra melted chocolate, it makes a perfect dip for fruit or pretzels.
Pro Tips for the Perfect Star Shape
Maintaining the sharp points of your star cookies is the secret to a professional look, so keep these expert tricks in mind while you bake.
The biggest tip I can give you is to chill your cut-out stars on the baking sheet for at least 15 minutes before they go into the oven, which prevents them from spreading and losing their defined shape. When dipping, ensure your chocolate is at a manageable temperature so it coats the cookie smoothly without being too runny. Also, apply your sprinkles immediately after dipping each cookie, while the chocolate is still wet, to ensure they adhere perfectly and create that iconic festive look.
Essential Kitchen Tools for Starry Success
Having the right tools on hand makes the process of cutting and decorating these cookies much more efficient and enjoyable.
- Star Cookie Cutters: Essential for achieving those crisp, uniform shapes that make these cookies stand out.
- Rolling Pin: Helps you achieve an even thickness across the dough, ensuring all your cookies bake at the same rate.
- Baking Sheet with Parchment Paper: Provides a non-stick surface for baking and a clean space for the chocolate-dipped cookies to set.
- Cooling Rack: Allows air to circulate around the baked stars so they become perfectly crisp as they cool.
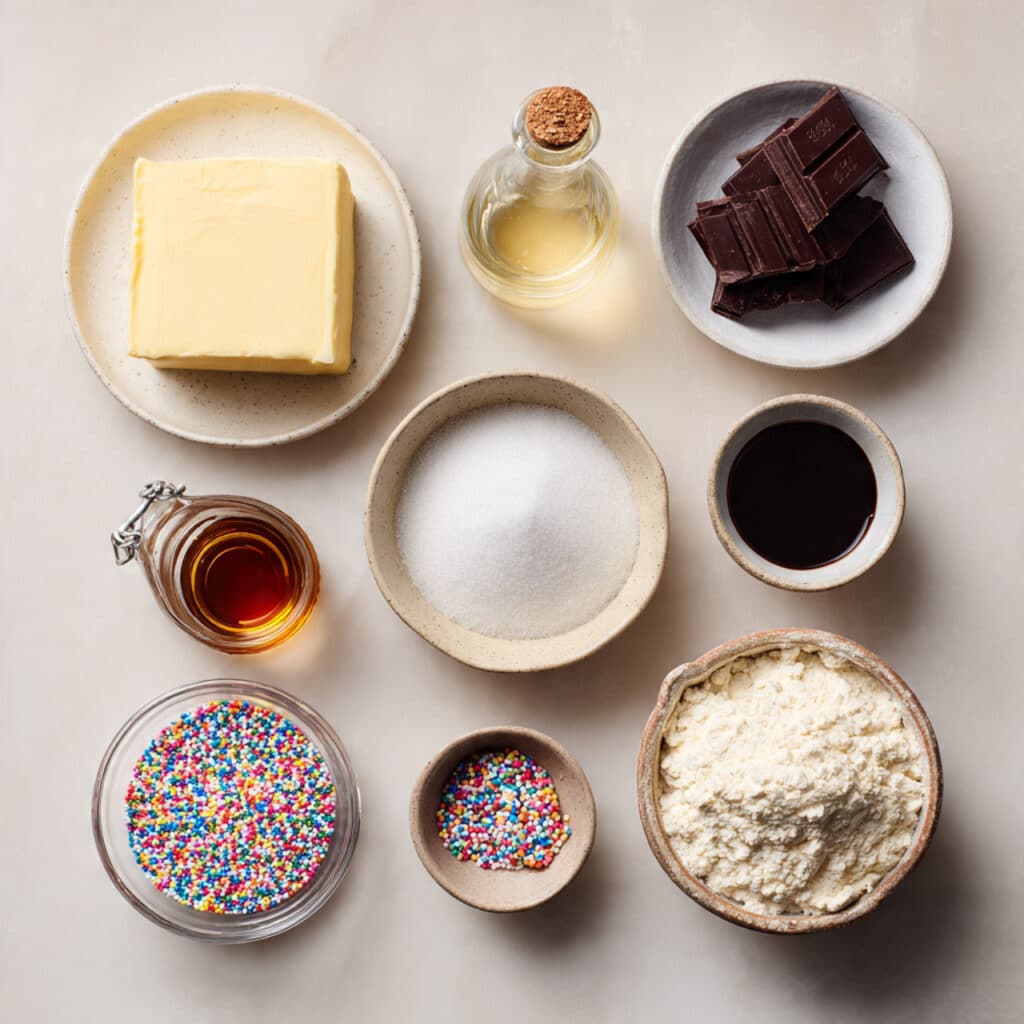
The Essential Ingredients for Your Cookie Stars
Every ingredient in this recipe is chosen to create a biscuit that is sturdy enough for dipping but tender enough to melt in your mouth.
- All-Purpose Flour: 2 1/2 cups to provide the necessary structure and “snap” for the shortbread base.
- Unsalted Butter: 1 cup softened to create the rich, buttery flavor and crumbly texture that defines a good cookie.
- Granulated Sugar: 3/4 cup to provide a delicate sweetness that allows the chocolate and butter flavors to shine.
- Vanilla Extract: 1 1/2 teaspoons to add a warm, floral aromatic that enhances the simple sweetness of the dough.
- Semi-Sweet Chocolate Chips: 1 1/2 cups of high-quality chocolate for a smooth, glossy coating.
- Rainbow Nonpareil Sprinkles: 1/2 cup of colorful sprinkles to add texture and a festive pop of color.
Flexible Ingredient Substitutions
If you find yourself missing an item, there are several ways to pivot while keeping the whimsical spirit of the cookies alive.
- Butter: You can use a high-quality vegan butter substitute for a dairy-free version of the base.
- Chocolate Chips: Dark chocolate chunks or even a white chocolate bar chopped into small pieces for melting.
- Vanilla Extract: Almond extract provides a lovely “wedding cake” flavor that pairs beautifully with sprinkles.
Spotlight on Our Key Ingredients
- Unsalted Butter: This is the foundation of the shortbread, responsible for the tender crumb and the decadent flavor that lingers after the first bite.
- Semi-Sweet Chocolate: This provides the rich, decadent shell that bridges the gap between the simple cookie and the crunchy sprinkles.
Let’s Enter the Star-Making Cooking Process
Rolling out dough and decorating with sprinkles is a joyful experience, so let’s get into the step-by-step process together.
- Preheat Your Equipment: Set your oven to 350°F and prepare your baking sheets with parchment paper so you can move quickly once the dough is ready.
- Combine Ingredients: Cream the softened butter and sugar until light and fluffy, then gradually incorporate the vanilla and flour until a smooth dough forms.
- Prepare Your Cooking Vessel: Roll the dough between two sheets of parchment paper to a 1/4-inch thickness and use your star cutters to create your shapes.
- Assemble the Dish: Place the stars on the prepared baking sheet and chill them briefly in the fridge to help them hold their points during baking.
- Cook to Perfection: Bake for 10 to 12 minutes until the edges are just barely starting to turn golden, then let them cool completely on a rack.
- Finishing Touches: Melt the chocolate in short bursts in the microwave, then dip half of each star into the chocolate and immediately top with sprinkles.
- Serve and Enjoy: Let the cookies rest on parchment paper until the chocolate has fully hardened, then arrange them on a platter for everyone to admire.
Developing Texture and Flavor
The beauty of these cookies lies in the progression of textures, starting with the crunchy “pop” of the sprinkles. This is immediately followed by the smooth, melting chocolate and then the crisp, buttery snap of the shortbread cookie itself. As the chocolate sets, it locks in the freshness of the biscuit, ensuring that the last cookie on the platter tastes just as buttery and delicious as the first.
Helpful Cooking Tips and Tricks
- Use a small offset spatula to help transfer the delicate cut-out stars from the rolling surface to the baking sheet.
- If your chocolate starts to thicken while dipping, simply pop it back into the microwave for 10 seconds to loosen it up.
- Work in small batches when applying sprinkles so the chocolate doesn’t set before you’ve had a chance to decorate.
Common Mistakes to Avoid
- Do not roll the dough too thin, or the stars will become fragile and may break during the dipping process.
- Avoid overbaking the cookies; they should be pale in the center and only very lightly golden on the bottom.
- Don’t dip the cookies while they are still warm, or the chocolate will melt and run off the cookie rather than coating it.
Nutrition Facts
- Servings: 24 cookies
- Calories per serving: 195
Note: These are approximate values.
Preparation and Timing
- Prep Time: 30 minutes
- Cook Time: 12 minutes
- Total Time: 42 minutes
Make-Ahead and Storage Advice
These cookies are excellent for gifting because they travel so well and stay fresh for a long time. You can store them in an airtight container at room temperature for up to a week, or freeze the undecorated cookies for up to a month. If you are layering them in a tin, place a sheet of parchment paper between the layers to keep the chocolate from scuffing or sticking to the other cookies.
Creative Ways to Serve
For a beautiful presentation, arrange the stars on a teal or dark blue napkin to make the colorful sprinkles really stand out. They look fantastic when served alongside a hot cup of tea or a festive glass of cold milk. If you’re hosting a party, you can even place one star on top of a scoop of vanilla ice cream for a quick and impressive dessert.
Transforming Your Leftovers
If you find yourself with any broken stars, you can crumble them up and use them as a spectacular mix-in for a batch of brownies or blondies. You can also layer the crumbs with whipped cream and fresh berries to create a quick and colorful “starry” trifle.
Additional Advice for Best Results
Always use the best quality butter you can find, as it is the primary flavor profile of the cookie itself. If you want a perfectly smooth chocolate finish, you can add a half-teaspoon of coconut oil to the chocolate while melting to give it a professional-looking sheen.
Make It a True Showstopper
To take these cookies to the next level, you can use a piping bag to add tiny dots of white chocolate in the center of the stars for extra detail. You could also experiment with using different shaped cutters, like hearts or circles, and using color-themed sprinkles for specific holidays like Valentine’s Day or Halloween.
Variations to Explore
- White Chocolate Lemon: Add lemon zest to the dough and dip in white chocolate with yellow sprinkles.
- Chocolate Shortbread: Replace 1/4 cup of flour with cocoa powder for a deep chocolate star base.
- Almond Joy Stars: Use almond extract and top the chocolate with shredded coconut instead of sprinkles.
- Spiced Stars: Add a teaspoon of cinnamon and a pinch of nutmeg to the dough for a warm, cozy flavor profile.
FAQ’s
- Can I use a different shape for these cookies?
Absolutely, circles, hearts, or even simple squares work just as well as the stars. - How do I get my stars to have sharp points?
The key is chilling the dough after cutting and before baking so the butter doesn’t melt too quickly. - What is the best way to melt the chocolate?
The microwave in 20-second intervals is the fastest, but a double boiler gives you more control. - Can I make these gluten-free?
Yes, you can substitute the all-purpose flour with a high-quality 1-to-1 gluten-free baking blend. - Do I have to use nonpareils?
No, any type of sprinkle, jimmies, or even edible glitter will work beautifully for decorating. - How long do the cookies need to set?
Usually about 30 minutes at room temperature, or 10 minutes in the fridge if you’re in a hurry. - Why did my cookies spread so much?
Your butter might have been too soft or the dough wasn’t chilled enough before going into the oven. - Can I use milk chocolate instead?
Yes, milk chocolate is a great choice if you prefer a sweeter, creamier finish. - Can I freeze the dough?
Yes, the raw dough freezes perfectly for up to three months; just thaw it in the fridge before rolling. - How many cookies does this recipe make?
This depends on the size of your cutter, but a standard 2-inch star cutter usually yields about 24 cookies.
Conclusion
Creating these Chocolate Covered Sprinkle Cookies is a reminder that the simplest treats often bring the most joy. With their buttery hearts and colorful coats, they are a celebration of fun and flavor that anyone can master in their own kitchen. I hope these little stars bring a bright spark to your next gathering or quiet afternoon. Now, it’s time to preheat that oven and let the sprinkle magic begin!
PrintChocolate Covered Sprinkle Cookies

Buttery star-shaped shortbread cookies partially dipped in smooth melted chocolate and covered in festive rainbow sprinkles.
Ingredients
- 2 1/2 cups All-Purpose Flour
- 1 cup Unsalted Butter, softened
- 3/4 cup Granulated Sugar
- 1 1/2 teaspoons Vanilla Extract
- 1 1/2 cups Semi-Sweet Chocolate Chips
- 1/2 cup Rainbow Nonpareil Sprinkles
Instructions
- Preheat your oven to 350°F and line two baking sheets with parchment paper.
- In a large bowl, cream together the softened butter and granulated sugar until the mixture is light and fluffy.
- Beat in the vanilla extract, then gradually mix in the flour until a smooth dough forms.
- Roll the dough out to a 1/4-inch thickness and use star-shaped cutters to create the cookies.
- Place the stars on the baking sheets and bake for 10-12 minutes until the edges are just barely golden.
- Allow the cookies to cool completely on a wire rack.
- Melt the chocolate chips in the microwave in 20-second intervals until smooth.
- Dip one half of each star into the chocolate and immediately top with rainbow sprinkles.
- Let the cookies set on parchment paper until the chocolate is firm.
Notes
- Chill the cut-out cookies for 15 minutes before baking to help them maintain their sharp star points.
- Apply sprinkles immediately after dipping each cookie so they stick before the chocolate sets.
- Add a tiny amount of coconut oil to the chocolate for a smoother, glossier finish.