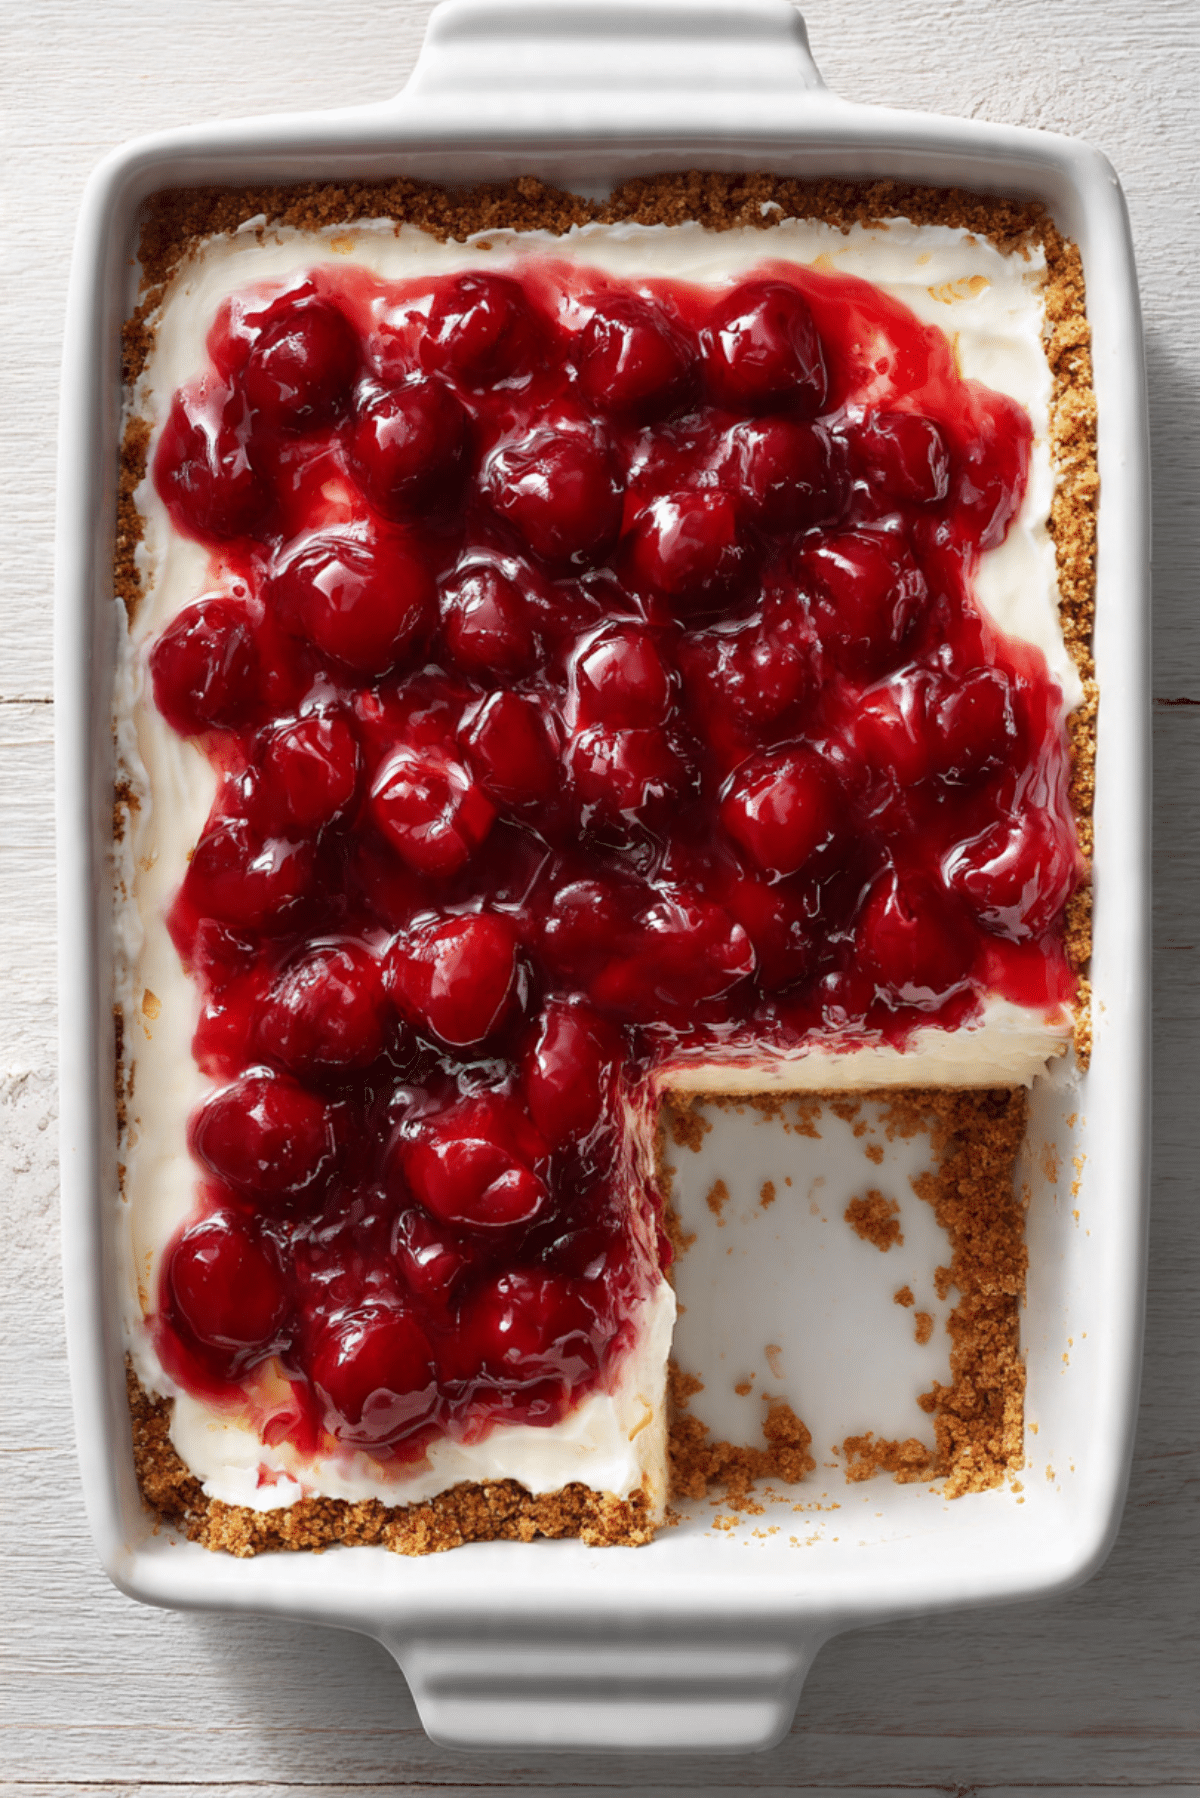
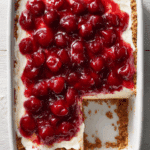
Cherry Delight
There’s something about Cherry Delight that takes you right back to joyful summer picnics and family potlucks. With its buttery graham cracker crust, creamy cheesecake-style middle, and sweet cherry topping, it’s the kind of dessert that makes you pause for a moment after the first bite. Each spoonful is silky, tart, and just the right amount of indulgent. Whether served chilled on a hot afternoon or sneaked from the fridge at midnight, Cherry Delight never disappoints.
Behind the Recipe
This recipe has roots in the kind of gatherings where everyone brings their signature dish and the dessert table is the main attraction. Cherry Delight was always my grandma’s specialty. She’d make it in this old glass dish with slightly chipped edges, and no matter how many other sweets were around, her Cherry Delight would be the first to go. That creamy filling and bright red topping were pure magic.
Recipe Origin or Trivia
Cherry Delight is a no-bake dessert that became especially popular in the 1950s and 60s in the United States. With the rise of convenience foods like canned pie fillings and boxed crackers, homemakers were creating quick desserts that still felt homemade. It became a staple in Southern and Midwestern kitchens and remains a beloved treat at church potlucks and holiday tables.
Why You’ll Love Cherry Delight
You’re going to adore this one. It’s effortless, stunning, and perfect for every kind of eater.
Versatile: Serve it in a large dish or individual cups. It fits brunches, BBQs, or holiday spreads.
Budget-Friendly: Uses pantry staples and affordable ingredients that stretch far.
Quick and Easy: No baking needed. Just mix, layer, chill, and enjoy.
Customizable: Try it with blueberry or strawberry topping instead of cherry.
Crowd-Pleasing: Everyone from picky kids to sweet-toothed adults loves it.
Make-Ahead Friendly: Prepare it the night before and let the fridge do the work.
Great for Leftovers: Tastes even better the next day as the flavors meld.
Chef’s Pro Tips for Perfect Results
This dessert might be simple, but these tips make it unforgettable.
- Use full-fat cream cheese for the richest texture.
- Make sure cream cheese is fully softened before mixing for a smooth filling.
- Chill the crust for at least 15 minutes before adding the filling to help it set.
- Let it chill at least 4 hours, but overnight is best for clean slices.
- Use an offset spatula to evenly spread the layers without disturbing the crust.
Kitchen Tools You’ll Need
To keep things smooth and simple, here’s what you’ll need:
Mixing Bowls: For blending the crust, filling, and whipped topping.
Electric Mixer: Helps achieve that creamy, lump-free filling.
Measuring Cups and Spoons: Accuracy is key to perfect layering.
Spatula or Offset Spreader: For evenly spreading layers.
9×13-inch Dish: Ideal size for the perfect thickness in each layer.
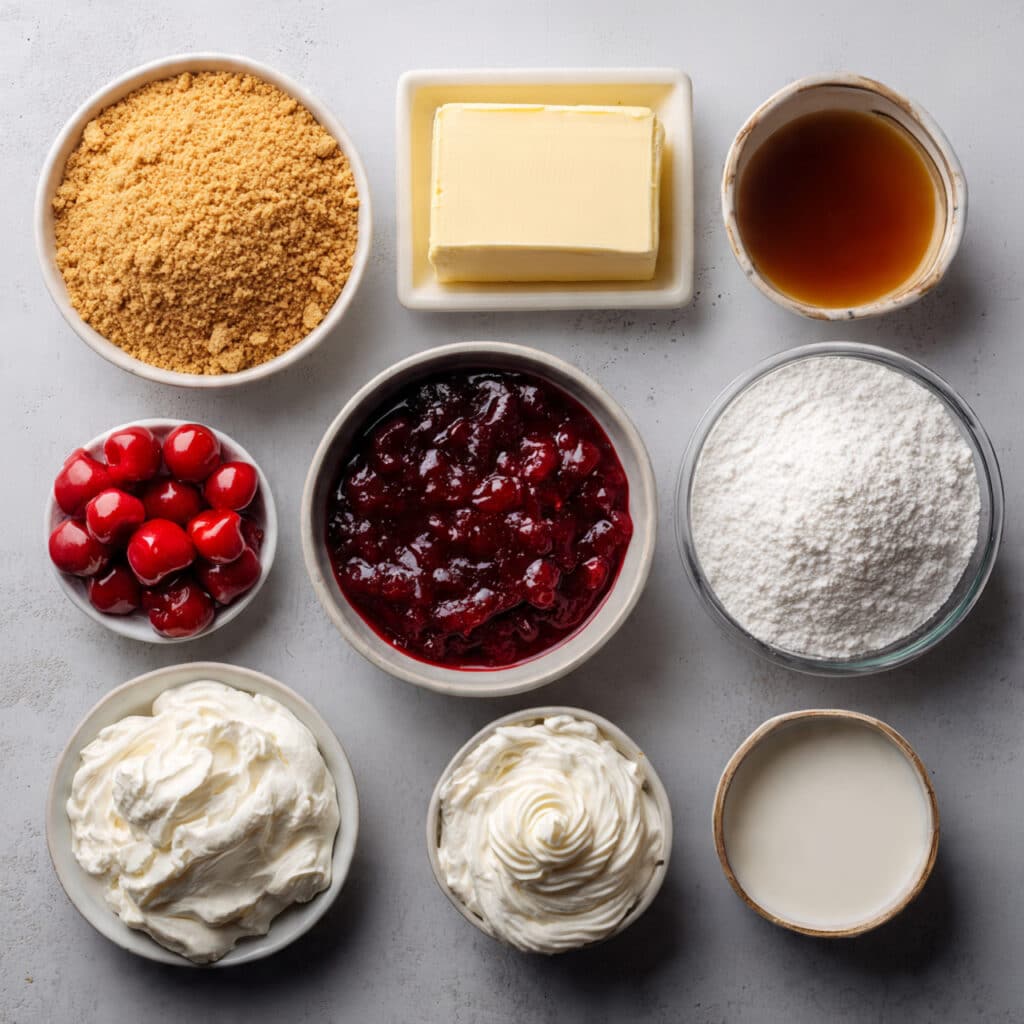
Ingredients in Cherry Delight
What makes this dessert sing is the perfect balance of sweet, tangy, and creamy. Here’s what you’ll need:
- Graham Cracker Crumbs: 2 cups – Forms the crunchy base with a warm, toasted flavor.
- Unsalted Butter (melted): 1/2 cup – Binds the crust and adds richness.
- Cream Cheese (softened): 16 oz – Creates the creamy, tangy middle layer.
- Powdered Sugar: 1 cup – Sweetens the filling without making it grainy.
- Vanilla Extract: 1 teaspoon – Adds depth and warmth to the filling.
- Whipped Topping (thawed): 8 oz – Lightens the cream cheese layer with a fluffy finish.
- Cherry Pie Filling: 1 can (21 oz) – Sweet, tart, and jewel-toned topping that ties it all together.
Ingredient Substitutions
There’s room to play with this recipe while keeping its charm.
Graham Cracker Crumbs: Crushed digestive biscuits or vanilla wafers.
Unsalted Butter: Salted butter works too, just reduce any added salt.
Cream Cheese: Mascarpone for a silkier texture or Neufchâtel for less fat.
Powdered Sugar: Granulated sugar, but whip longer to dissolve.
Whipped Topping: Homemade whipped cream for a richer version.
Cherry Pie Filling: Blueberry or raspberry pie filling, or even lemon curd.
Ingredient Spotlight
Cream Cheese: This ingredient is the heart of the filling, bringing smooth, tangy richness that balances the sweetness of the crust and topping.
Cherry Pie Filling: Not just for looks, the cherries bring a bright, tart flavor that wakes up every bite.
Instructions for Making Cherry Delight
Making Cherry Delight feels like assembling a little love in a dish. Here’s how to bring it all together:
- Preheat Your Equipment:
No oven needed here, but have your 9×13-inch dish ready and chill it if possible. - Combine Ingredients:
Mix graham cracker crumbs and melted butter in a bowl until the texture resembles wet sand. - Prepare Your Cooking Vessel:
Press the crumb mixture evenly into the bottom of the dish. Chill in the fridge while preparing the filling. - Assemble the Dish:
In another bowl, beat cream cheese, powdered sugar, and vanilla extract until smooth. Fold in whipped topping gently until combined. - Cook to Perfection:
Spread the creamy layer over the chilled crust. Carefully spoon the cherry pie filling over the top, spreading it evenly. - Finishing Touches:
Cover with plastic wrap and refrigerate for at least 4 hours or overnight. - Serve and Enjoy:
Slice into squares and serve cold. Wipe your knife between cuts for neat layers.
Texture & Flavor Secrets
The magic lies in the contrast: a crunchy, buttery crust gives way to a cloud-like, tangy filling, all finished with juicy, bright cherry topping. The cold temperature adds a refreshing edge, and each bite melts just slightly on your tongue.
Cooking Tips & Tricks
Here’s how to get it just right every time:
- Chill the crust before adding the filling to keep layers clean.
- Use a chilled dish to help everything set faster.
- If using homemade whipped cream, make sure it holds stiff peaks.
What to Avoid
Even easy recipes have their pitfalls. Let’s dodge them.
- Overmixing whipped topping: It can deflate and ruin the fluffy texture.
- Warm ingredients: Always use softened, not melted, cream cheese.
- Rushing chill time: This dessert needs time to firm up for perfect slices.
Nutrition Facts
Servings: 12
Calories per serving: 320
Note: These are approximate values.
Preparation Time
Prep Time: 15 minutes
Cook Time: 0 minutes
Total Time: 4 hours 15 minutes (includes chilling)
Make-Ahead and Storage Tips
This dessert is made for prepping ahead. In fact, the longer it chills, the better it sets. Store it tightly wrapped in the fridge for up to 5 days. You can also freeze it for up to 2 months. Just thaw overnight in the fridge before serving.
How to Serve Cherry Delight
Serve it cold, in big square slices or even spooned into bowls. Pair it with a hot cup of coffee or a sparkling drink for contrast. It also looks beautiful with a little dollop of whipped cream and a fresh cherry on top.
Creative Leftover Transformations
Don’t let a single bite go to waste.
- Spoon it into mason jars for individual desserts on-the-go.
- Use it as a filling for mini tart shells.
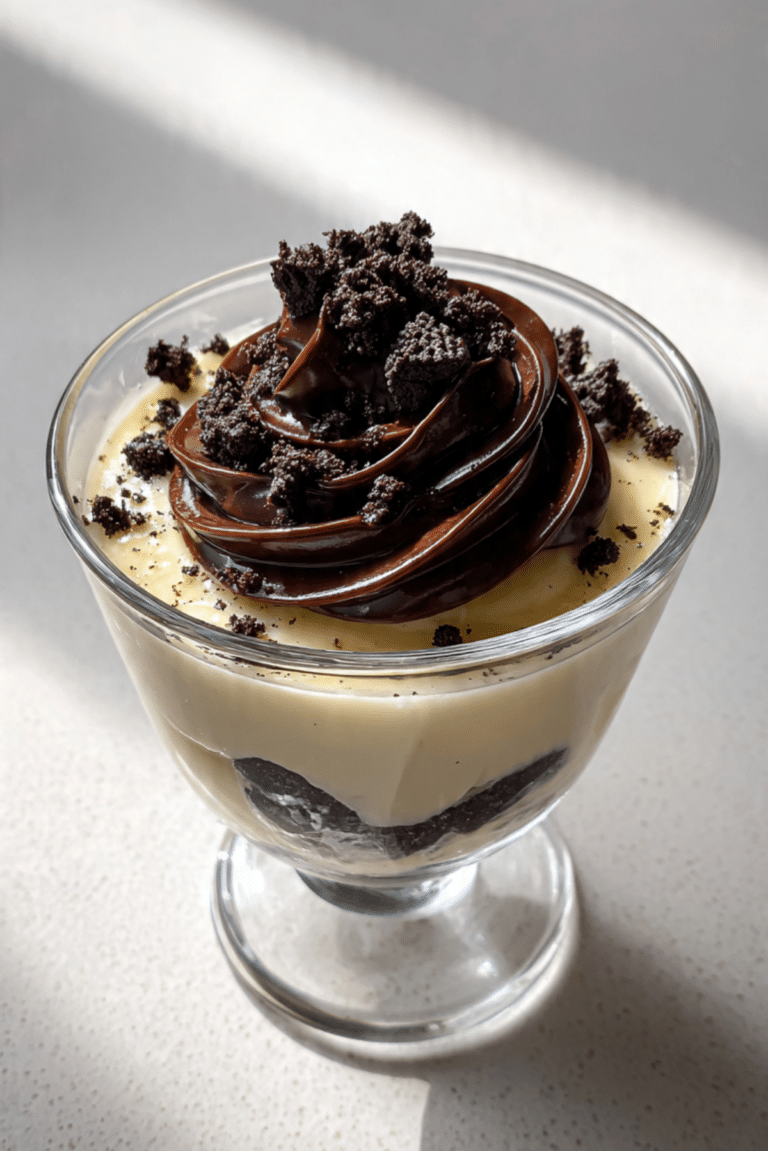
- Layer it with chocolate pudding for a decadent parfait.
Additional Tips
- Want a thicker crust? Add another half cup of crumbs and a touch more butter.
- Make it gluten-free by using GF graham crackers.
- Chill your mixing bowl and beaters for fluffier whipped topping.
Make It a Showstopper
Serve it in a glass dish to showcase the pretty layers. Top with a few fresh cherries and mint leaves for extra flair. A clean slice with those defined layers will have your guests swooning.
Variations to Try
- Tropical Twist: Swap cherry filling for pineapple and sprinkle toasted coconut on top.
- Chocolate Cherry: Add a layer of mini chocolate chips between filling and cherries.
- Lemon Delight: Use lemon curd and a shortbread crust for a citrusy spin.
- Berry Medley: Use mixed berry pie filling instead of just cherry.
- Mini Cups: Assemble in small cups for perfect individual servings.
FAQ’s
Q1: Can I use fresh cherries instead of canned?
Yes, but you’ll need to cook them down with sugar and cornstarch first to create the thick topping.
Q2: How long does it last in the fridge?
It stays fresh for up to 5 days when covered and refrigerated.
Q3: Can I freeze Cherry Delight?
Absolutely. Wrap it tightly and freeze for up to 2 months. Thaw in the fridge overnight.
Q4: What if I don’t have whipped topping?
You can use homemade whipped cream as long as it’s whipped to stiff peaks.
Q5: Can I make it in advance?
Yes, it’s best when made the night before serving.
Q6: Is this gluten-free?
Not by default, but you can use gluten-free graham crackers for the crust.
Q7: Can I reduce the sugar?
You can slightly reduce the powdered sugar without affecting texture, but taste as you go.
Q8: Can I use low-fat cream cheese?
Yes, but the texture might be a bit softer and less rich.
Q9: Why is my filling lumpy?
Your cream cheese likely wasn’t soft enough. Let it come fully to room temperature next time.
Q10: Can I double the recipe?
Yes, use a larger dish or make two separate pans to keep the layers balanced.
Conclusion
Cherry Delight is one of those desserts that never goes out of style. It’s nostalgic, easy to make, and always a hit. Whether you’re bringing it to a party or making it just because, trust me, it’s worth every bite. Once you try it, it’ll become one of your go-to favorites.
PrintCherry Delight
A nostalgic no-bake dessert featuring a buttery graham cracker crust, creamy whipped filling, and sweet cherry topping. Perfect for gatherings, make-ahead meals, or an anytime treat.
Ingredients
- 2 cups graham cracker crumbs
- 1/2 cup unsalted butter, melted
- 16 oz cream cheese, softened
- 1 cup powdered sugar
- 1 teaspoon vanilla extract
- 8 oz whipped topping, thawed
- 1 can (21 oz) cherry pie filling
Instructions
- Mix graham cracker crumbs and melted butter until combined. Press into the bottom of a 9×13-inch dish. Chill while preparing the filling.
- Beat softened cream cheese, powdered sugar, and vanilla extract until smooth.
- Fold in the whipped topping gently until fully combined.
- Spread the creamy filling over the crust evenly.
- Spoon cherry pie filling over the top and spread gently.
- Cover and refrigerate for at least 4 hours or overnight for best results.
- Slice, serve cold, and enjoy!
Notes
- Make sure cream cheese is fully softened to avoid lumps.
- Use an offset spatula to get smooth layers.
- Let it chill overnight for clean slices and full flavor.