Cake Balls
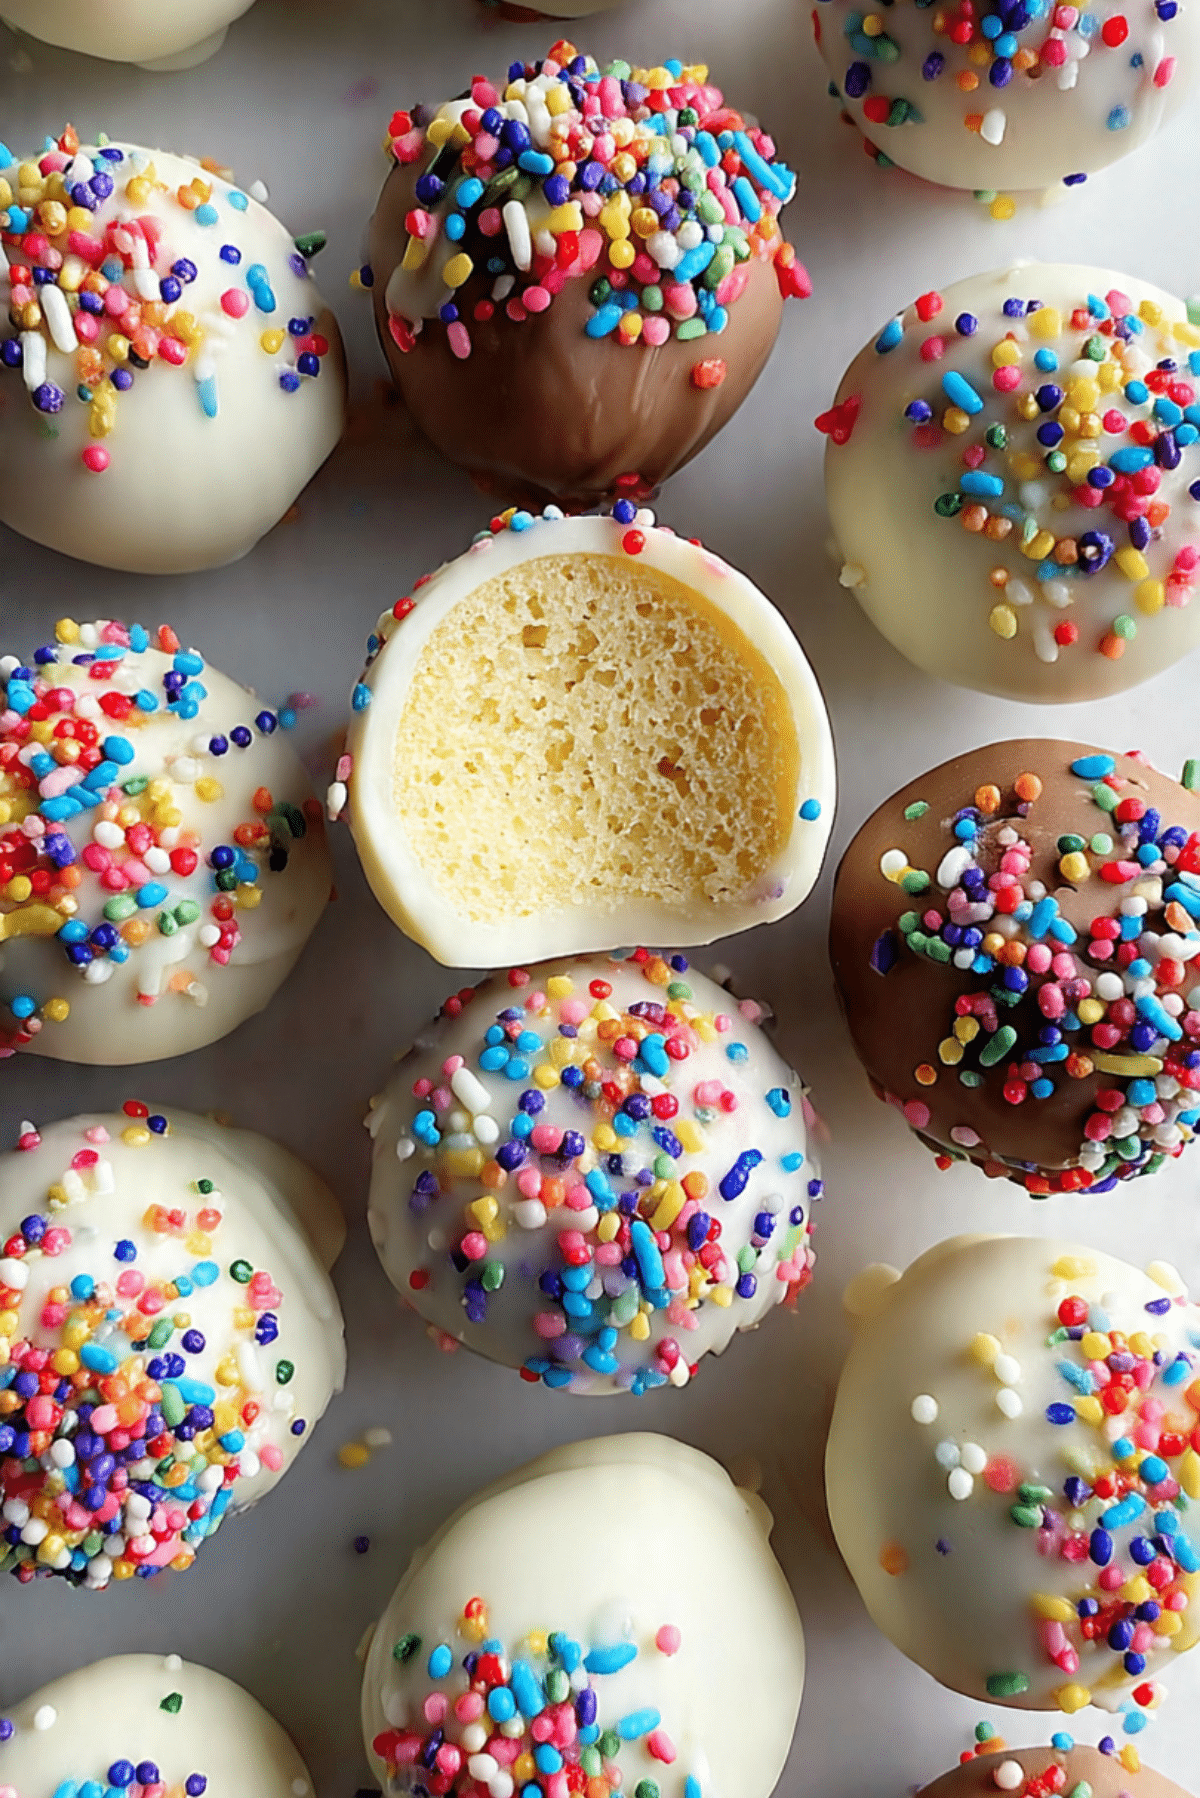
Cake Balls are the perfect bite-sized treat — soft, moist cake crumbs mixed with frosting, rolled into balls, dipped in chocolate, and dressed up with colorful sprinkles. They’re fun to make, easy to customize, and almost too cute to eat. Whether you need a party treat, gift box filler, or just something sweet to snack on, cake balls are a guaranteed win.
Behind the Recipe
It all started with leftover cake. I couldn’t bring myself to toss out those broken pieces after a celebration, so I mixed them with a little frosting, rolled them up, and dipped them in chocolate. What came out was magic — fudgy, sweet, and bite-sized. Over time, I’ve played with every combo you can imagine, from red velvet to lemon, but vanilla with rainbow sprinkles always feels the most festive. It’s nostalgic, playful, and absolutely irresistible.
Recipe Origin or Trivia
Cake balls were born out of cake pops — popularized by home bakers and craft bloggers in the early 2000s. Though cake pops are served on sticks, cake balls ditch the handle for easier dipping and a more elegant presentation. They’re beloved in bakeries, gift boxes, and dessert tables for their customization and charm. You can find them dressed up for weddings, birthdays, or tucked into holiday tins.
Why You’ll Love Cake Balls
These sweet little bites pack a ton of joy into a small package. Here’s why they’re a must-make:
Versatile: Use any cake and frosting combo you like.
Budget-Friendly: Great way to use up leftover cake or pantry basics.
Quick and Easy: Especially if you start with a boxed cake mix.
Customizable: Switch up the flavors, coatings, and decorations.
Crowd-Pleasing: Kids and adults both go crazy for them.
Make-Ahead Friendly: Store well in the fridge or freezer.
Great for Leftovers: No one will know it started as a crumbled cake!
Chef’s Pro Tips for Perfect Results
Here’s how to make your cake balls bakery-worthy:
- Chill Before Dipping: Firm balls hold up better when coating in chocolate.
- Use a Cookie Scoop: Helps portion evenly for a professional look.
- Melt Chocolate Gently: Use a microwave or double boiler to avoid burning.
- Tap Off Excess Coating: Let the chocolate drip before placing on parchment.
- Sprinkle While Wet: Add decorations immediately after dipping so they stick.
Kitchen Tools You’ll Need
Nothing too fancy — just a few kitchen basics:
Mixing Bowl: For combining cake and frosting.
Baking Sheet: To hold and chill the rolled balls.
Parchment Paper: Prevents sticking and makes cleanup easy.
Cookie Scoop: For evenly sized cake balls.
Microwave-Safe Bowl: For melting chocolate.
Fork or Dipping Tool: To coat cake balls smoothly.
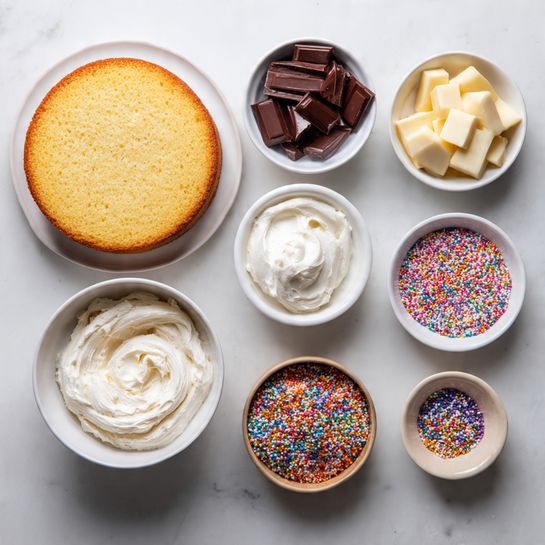
Ingredients in Cake Balls
Here’s what you’ll need for these colorful treats:
- Vanilla Cake: 1 standard 9×13-inch baked cake (boxed or homemade). The base of your cake balls.
- Vanilla Frosting: 3/4 cup. Binds the cake crumbs together and adds sweetness.
- White Chocolate Melts: 1 1/2 cups. Smooth, sweet coating for dipping.
- Milk Chocolate Melts: 1 1/2 cups. Adds contrast and richness to your batch.
- Rainbow Sprinkles: 1/2 cup. For a festive finish.
Ingredient Substitutions
Want to switch it up? Here are some easy swaps:
Vanilla Cake: Use chocolate, red velvet, lemon, or funfetti cake.
Vanilla Frosting: Cream cheese or chocolate frosting works beautifully.
White/Milk Chocolate: Use candy melts, almond bark, or dark chocolate.
Sprinkles: Swap for crushed nuts, shredded coconut, or sanding sugar.
Ingredient Spotlight
Cake Crumbs: These form the core texture. You want them moist but not soggy, so add frosting slowly until it holds together without being sticky.
Melting Chocolate: Use good quality melting wafers for smooth dipping. Avoid regular chocolate chips, which don’t melt or coat as evenly.
Instructions for Making Cake Balls
Let’s get to the fun part. Here are the steps you’re going to follow:
- Preheat Your Equipment:
No preheating needed, but line a baking sheet with parchment paper and set aside. - Combine Ingredients:
Crumble the cooled cake into fine crumbs in a large bowl. Add frosting a spoonful at a time, mixing until the texture is like playdough and holds together when pressed. - Prepare Your Cooking Vessel:
Use a cookie scoop to portion the mixture, then roll into smooth balls by hand. Place on the lined baking sheet. - Assemble the Dish:
Chill the cake balls in the fridge for at least 1 hour or in the freezer for 30 minutes to firm up. - Cook to Perfection:
Melt white and milk chocolate in separate bowls. Using a fork or dipping tool, coat each cake ball in chocolate and gently tap off the excess. - Finishing Touches:
Place dipped balls back on parchment and immediately top with sprinkles. Let sit at room temperature until chocolate hardens. - Serve and Enjoy:
Transfer to a serving tray or gift box. Store in the fridge or enjoy immediately — just try not to eat them all at once!
Texture & Flavor Secrets
The inside should be soft and fudgy, while the outer shell gives a satisfying snap. Using just the right amount of frosting creates that melt-in-your-mouth texture without being too sweet or mushy. The chocolate coating adds richness, and the sprinkles bring crunch and color.
Cooking Tips & Tricks
Make the most of every batch:
- Don’t overdo the frosting — start small and add more as needed.
- Roll with clean hands or wear gloves for smooth, uniform balls.
- Use a fork or dipping tool, not a spoon, for neater chocolate coating.
What to Avoid
Keep an eye out for these common mistakes:
- Too much frosting: Makes them gummy and hard to roll.
- Overheating chocolate: It seizes and becomes unusable.
- Skipping the chill step: Warm cake balls fall apart when dipped.
Nutrition Facts
Servings: 24
Calories per serving: 170
Note: These are approximate values.
Preparation Time
Prep Time: 20 minutes
Cook Time: 0 minutes
Total Time: 1 hour 20 minutes (includes chilling)
Make-Ahead and Storage Tips
These are perfect for prepping ahead. Once set, store them in an airtight container in the fridge for up to a week. You can also freeze undipped cake balls, then dip fresh before serving. They’re great for holiday prep and dessert trays!
How to Serve Cake Balls
Pile them onto a platter, serve in mini cupcake liners, or arrange in gift boxes for birthdays or holidays. You can also stick them on skewers or pop them onto a stick to turn them into cake pops!
Creative Leftover Transformations
If you happen to have leftovers (doubtful!), try these:
- Cake Ball Milkshake: Blend with vanilla ice cream and a splash of milk.
- Cake Ball Parfait: Layer with whipped cream and berries in a glass.
- Crumbled Topping: Chop and sprinkle over frosted cupcakes or a bowl of ice cream.
Additional Tips
A few final notes to help you out:
- Add a pinch of salt to the chocolate for contrast.
- Color-code your coating and sprinkles for different flavors.
- Make mini cake balls for party platters or large ones for gift boxes.
Make It a Showstopper
Dip half in white and half in milk chocolate for a color contrast. Use metallic or themed sprinkles for birthdays, weddings, or holidays. Stack them into a pyramid on a platter and tie with a ribbon for a party centerpiece.
Variations to Try
- Red Velvet Cake Balls: With cream cheese frosting and white chocolate.
- Lemon Cake Balls: Use lemon cake and lemon zest in the frosting.
- Chocolate Peanut Butter: Chocolate cake with peanut butter frosting and dark chocolate coating.
- Strawberry Shortcake Balls: Strawberry cake and vanilla frosting with pink drizzle.
- Birthday Cake Balls: Funfetti cake and vanilla frosting with bright rainbow sprinkles.
FAQ’s
1. Can I use boxed cake mix?
Absolutely — it’s the easiest way to start.
2. Can I make these gluten-free?
Yes, just use a gluten-free cake mix.
3. Can I freeze them?
Yes, freeze dipped or undipped cake balls in an airtight container.
4. What chocolate works best?
Use candy melts or almond bark for easy dipping.
5. Do I need to refrigerate them?
Yes, especially if made with cream cheese frosting.
6. Can I make them vegan?
Use vegan cake and frosting plus dairy-free chocolate coating.
7. How long do they last?
Up to 7 days in the fridge or 2 months in the freezer.
8. How many cake balls does one cake make?
About 24 standard-size balls from a 9×13-inch cake.
9. Can I decorate them with more than sprinkles?
Sure! Try edible glitter, nuts, crushed cookies, or drizzle.
10. Can I use leftover cupcakes?
Yes, just remove the liners and crumble them like regular cake.
Conclusion
Cake Balls are the ultimate feel-good dessert — cute, colorful, and packed with flavor in every bite. They’re fun to make, even more fun to eat, and guaranteed to brighten up any dessert table. Whether you stick with vanilla or get creative with flavors, trust me, you’ll want to make these again and again.
PrintCake Balls
Soft, sweet vanilla cake mixed with frosting, rolled into bite-sized balls, dipped in chocolate, and topped with colorful sprinkles. These cake balls are perfect for parties, gifts, or anytime you need a fun, festive treat.
Ingredients
- 1 (9×13-inch) vanilla cake, baked and cooled (boxed or homemade)
- 3/4 cup vanilla frosting
- 1 1/2 cups white chocolate melts
- 1 1/2 cups milk chocolate melts
- 1/2 cup rainbow sprinkles
Instructions
- Crumble cooled cake into fine crumbs in a large bowl.
- Mix in frosting a spoonful at a time until mixture holds together like dough.
- Roll into balls using a cookie scoop and your hands. Place on a parchment-lined baking sheet.
- Chill cake balls in the fridge for 1 hour or freeze for 30 minutes.
- Melt white and milk chocolate in separate microwave-safe bowls until smooth.
- Dip chilled cake balls in chocolate, tapping off excess, and place back on parchment.
- Top with sprinkles while chocolate is still wet. Let sit until coating is fully set.
- Store in an airtight container in the fridge or serve immediately.
Notes
- Add frosting gradually to avoid making the mixture too wet.
- Chilling is key for dipping success.
- Use candy melts for easier coating if available.