Brown Butter Gravy
There’s something undeniably magical about a velvety, deeply flavored gravy poured over a warm plate of comfort food. This Brown Butter Gravy is rich, nutty, and packed with depth thanks to the simple step of browning your butter first. It’s the kind of sauce that turns a regular dinner into something extraordinary—creamy, indulgent, and worthy of every single spoonful.
Behind the Recipe
The inspiration for this recipe came one holiday when the turkey was perfect, but the gravy felt flat. I browned the butter on a whim, stirred in flour and broth, and suddenly—magic. It had that toasty, caramelized flavor that lifted everything on the plate. Since then, this has been my go-to gravy for everything from mashed potatoes to roasted vegetables and beyond.
Recipe Origin or Trivia
Gravy has deep culinary roots across cultures, from pan sauces in French cuisine to rich meat-based sauces in Southern cooking. Browning butter is a technique known in French as “beurre noisette,” meaning hazelnut butter, named for its nutty aroma. By blending this technique with traditional gravy-making, we get a silky sauce that’s both elevated and comforting.
Why You’ll Love Brown Butter Gravy
This gravy doesn’t just sit quietly on the side—it steals the show.
Versatile: Pairs beautifully with turkey, chicken, mashed potatoes, stuffing, or roasted veggies.
Budget-Friendly: Made with just a few pantry staples and no need for drippings.
Quick and Easy: Comes together in under 15 minutes with one pan.
Customizable: Use broth, stock, or even plant-based versions.
Crowd-Pleasing: That rich, nutty flavor gets rave reviews every time.
Make-Ahead Friendly: Stores well and reheats beautifully for stress-free meals.
Great for Leftovers: Add to sandwiches, grain bowls, or pasta for bonus flavor.
Chef’s Pro Tips for Perfect Results
This gravy is simple but these tips will take it to the next level:
- Watch the Butter Closely: It can go from brown to burnt fast—remove from heat once it smells nutty and turns golden.
- Use a Whisk: Constant whisking prevents lumps and creates a silky finish.
- Warm the Broth First: Adding cold broth can seize the butter. Warm broth keeps everything smooth.
- Taste and Adjust: Don’t forget to taste and balance with salt and pepper at the end.
- Add a Splash of Vinegar or Lemon: A tiny bit of acid at the end brightens the flavor.
Kitchen Tools You’ll Need
Just the basics, but each one plays a role in the smooth result:
Saucepan: Preferably light-colored so you can see the butter browning.
Whisk: Essential for blending and removing lumps.
Measuring Cups & Spoons: For precision in ratios.
Ladle or Gravy Boat: For serving the finished sauce.
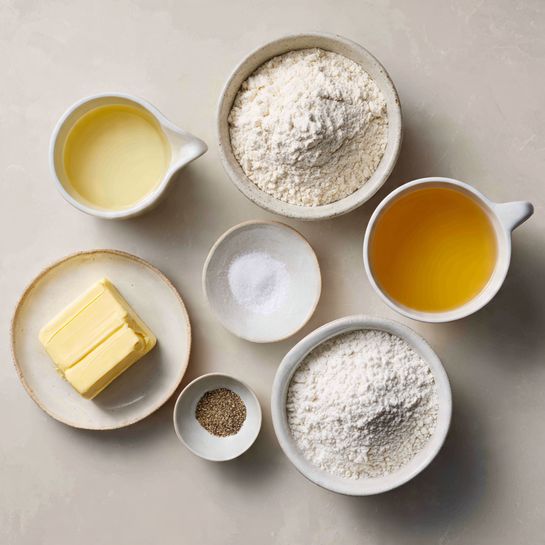
Ingredients in Brown Butter Gravy
This short ingredient list turns into something magical with just a little heat and care.
- Unsalted Butter: 4 tablespoons. Browning adds rich, nutty flavor.
- All-Purpose Flour: 3 tablespoons. Creates the base roux to thicken the gravy.
- Vegetable Broth: 2 cups, warm. The liquid base that carries all the flavor.
- Salt: 1/2 teaspoon, or to taste. Enhances all the other ingredients.
- Black Pepper: 1/4 teaspoon freshly ground. Adds warmth and depth.
- Optional Apple Cider Vinegar or Lemon Juice: 1/2 teaspoon. Adds balance and brightness.
Ingredient Substitutions
Make it work with what you’ve got:
Butter: Use ghee for a deeper nuttiness, or vegan butter for a dairy-free version.
Flour: Substitute with gluten-free flour blend or cornstarch (use half the amount).
Vegetable Broth: Swap with chicken or turkey broth, or a mushroom broth for extra depth.
Ingredient Spotlight
Browned Butter: This step is what gives the gravy its toasty, rich character. The milk solids in butter caramelize as they cook, creating deep nutty notes that taste like roasted hazelnuts.
Vegetable Broth: A clean, mild base that lets the brown butter shine. Choose low sodium so you can season to taste.
Instructions for Making Brown Butter Gravy
This gravy comes together quickly, so have your ingredients prepped and ready. Once you start browning the butter, things move fast.
- Preheat Your Equipment:
Place a light-colored saucepan over medium heat. - Combine Ingredients:
Add butter and cook until melted, then continue to cook, swirling gently, until butter turns golden brown and smells nutty (about 3–4 minutes). - Prepare Your Cooking Vessel:
Immediately whisk in flour and stir constantly for 1–2 minutes to form a smooth, golden roux. - Assemble the Dish:
Slowly add warm broth, whisking continuously to keep the mixture smooth. - Cook to Perfection:
Bring to a simmer and cook 5–7 minutes, whisking, until thickened to desired consistency. - Finishing Touches:
Stir in salt, pepper, and optional splash of vinegar or lemon juice. Taste and adjust. - Serve and Enjoy:
Pour into a gravy boat and serve warm over your favorite dishes.
Texture & Flavor Secrets
The beauty of this gravy lies in its smooth, luxurious texture and rich, nutty undertone. Browning the butter adds complexity, while constant whisking ensures every pour is velvety and lump-free. The final splash of acid cuts through the richness to bring balance and brightness.
Cooking Tips & Tricks
For flawless results, keep these in mind:
- Use a light-colored pan so you can see when the butter browns.
- Whisk constantly when adding the broth to prevent lumps.
- Simmer longer if you want a thicker gravy, or add extra broth for thinner texture.
What to Avoid
Even a simple sauce like this can go sideways—here’s how to avoid that:
- Burning the Butter: Remove it from heat as soon as it browns.
- Cold Broth: Can cause clumping. Warm it first.
- Over-Salting: If using regular broth, reduce salt and taste before adding more.
Nutrition Facts
Servings: 6
Calories per serving: 90
Note: These are approximate values.
Preparation Time
Prep Time: 5 minutes
Cook Time: 10 minutes
Total Time: 15 minutes
Make-Ahead and Storage Tips
Brown Butter Gravy can be made up to 3 days in advance. Let it cool, then store in an airtight container in the fridge. Reheat over low heat, whisking constantly and adding a splash of broth or water if needed. It also freezes well for up to 1 month.
How to Serve Brown Butter Gravy
Serve it warm and generously over turkey, mashed potatoes, roasted root vegetables, or even stuffing. It’s also fantastic drizzled over grain bowls or used as a dip for crusty bread.
Creative Leftover Transformations
Give your extra gravy new life with these fun ideas:
- Stir into risotto or pasta for a creamy sauce.
- Use as a base for a pot pie filling.
- Drizzle over roasted mushrooms or sautéed greens.
Additional Tips
For extra flavor and ease:
- Add a pinch of dried thyme or rosemary for herb notes.
- Strain the gravy if you want it extra silky.
- Make a double batch—it goes fast.
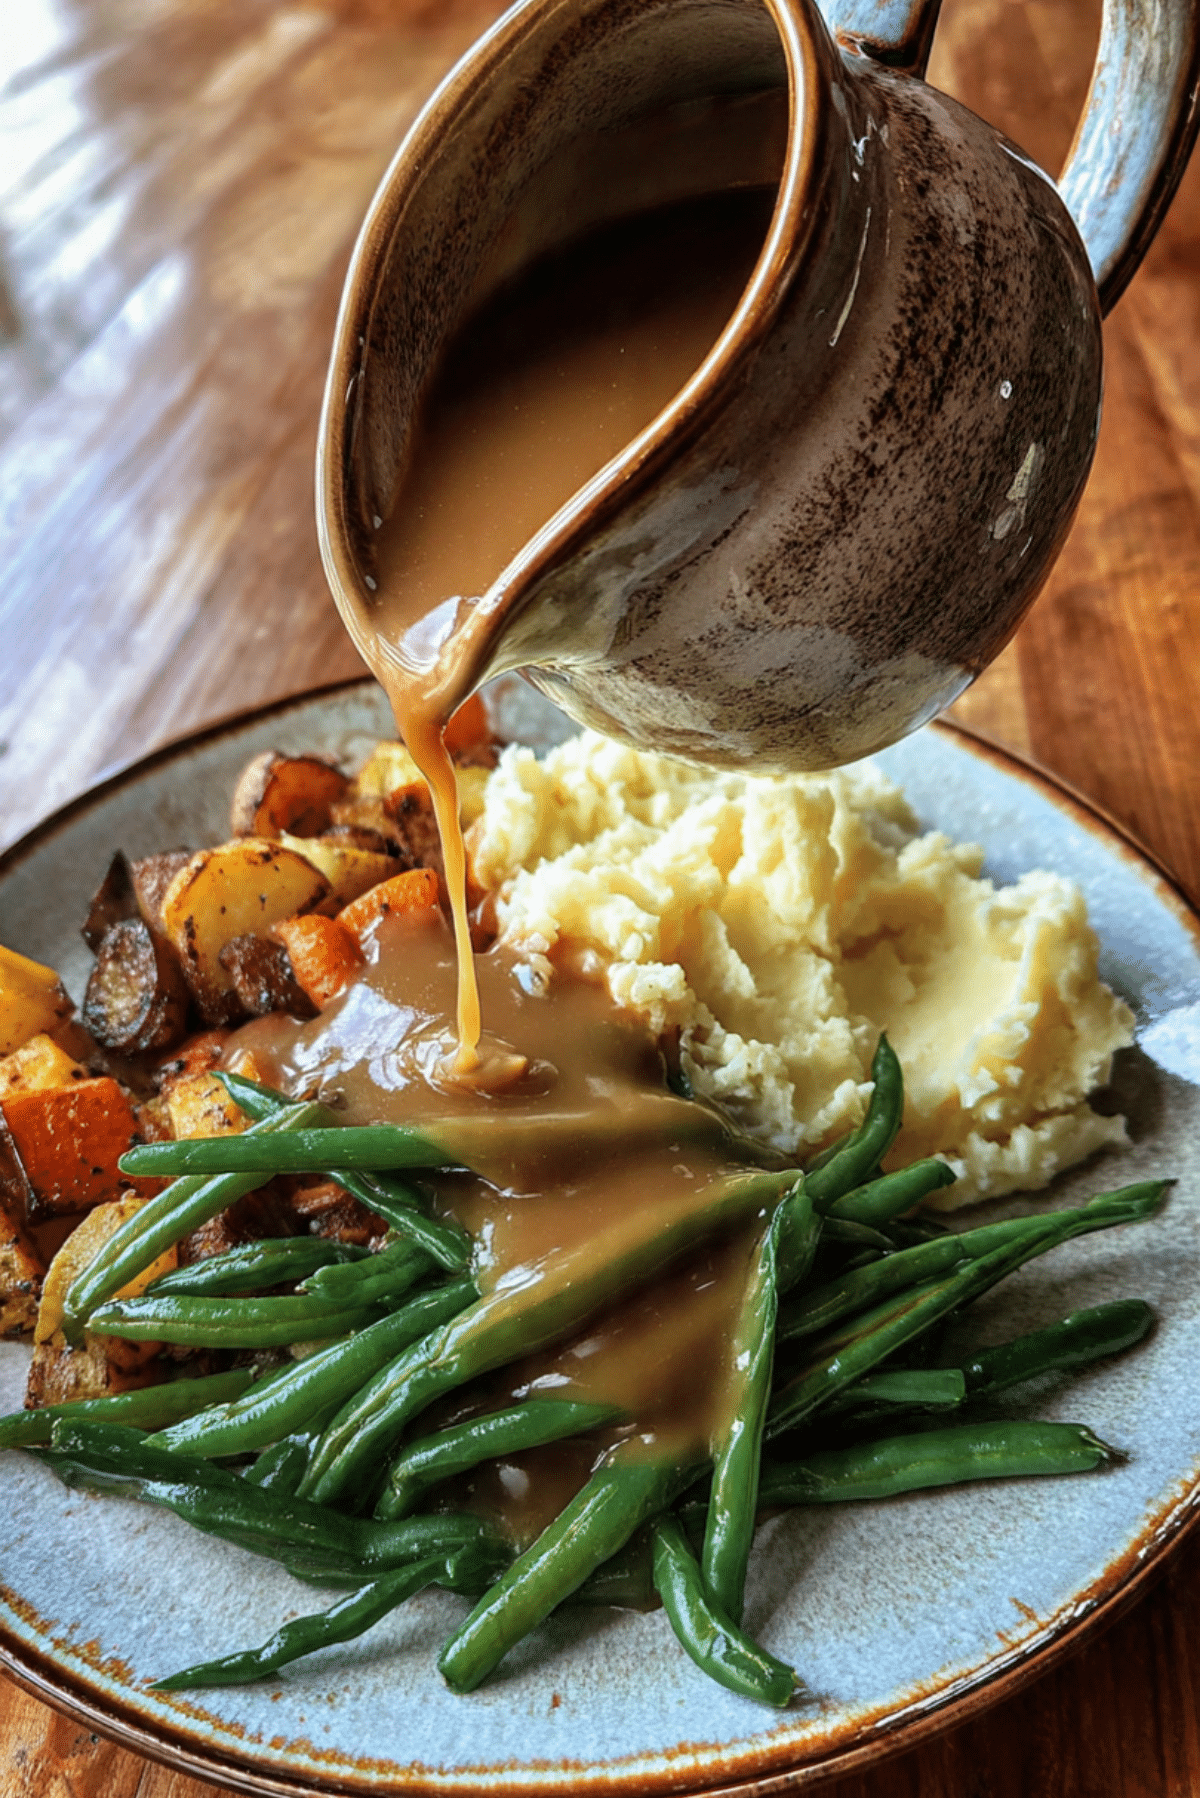
Make It a Showstopper
Serve in a beautiful ceramic jug or gravy boat with a sprig of thyme or a swirl of browned butter on top. Let it cascade over your mashed potatoes and veggies just before serving for that jaw-dropping, mouth-watering moment.
Variations to Try
- Mushroom Brown Butter Gravy: Add sautéed mushrooms for umami depth.
- Garlic Infused: Add a clove of garlic while browning butter, then remove before adding flour.
- Spiced Up: Add a pinch of cayenne or smoked paprika.
- Dairy-Free Version: Use vegan butter and gluten-free flour for a fully plant-based option.
- Creamy Twist: Add a splash of cream or plant milk for a richer version.
FAQ’s
Q1: Can I make this gluten-free?
Yes, use gluten-free flour blend or cornstarch (half the amount) and adjust thickness to taste.
Q2: What if I burn the butter?
Start over. Burnt butter will make the whole gravy taste bitter.
Q3: Can I use salted butter?
Yes, but reduce added salt and taste before adjusting.
Q4: How do I thin out thick gravy?
Add a little more warm broth or water and whisk gently.
Q5: Can I freeze it?
Yes. Cool completely and freeze for up to a month in an airtight container.
Q6: Is this vegetarian or vegan?
Vegetarian as written. Use vegan butter and broth to make it vegan.
Q7: Can I make it ahead of time?
Absolutely. It holds well in the fridge for up to 3 days.
Q8: What’s the best broth to use?
Low-sodium vegetable broth or homemade stock for best control over seasoning.
Q9: Why does my gravy taste flat?
Try a splash of acid like lemon juice or vinegar to balance it.
Q10: Can I add herbs?
Yes. Thyme, sage, or rosemary pair beautifully with the browned butter flavor.
Conclusion
Brown Butter Gravy is that extra touch that turns a good meal into something memorable. Rich, warm, nutty, and incredibly smooth, it’s a small step with big flavor results. Trust me, once you try it, you’ll never make plain gravy again.
PrintBrown Butter Gravy
Rich, velvety gravy made with nutty brown butter and warm spices. Perfect over mashed potatoes, roasted vegetables, or any cozy meal. Ready in minutes with deep, toasty flavor.
Ingredients
- 4 tablespoons unsalted butter
- 3 tablespoons all-purpose flour
- 2 cups warm vegetable broth
- 1/2 teaspoon salt (adjust to taste)
- 1/4 teaspoon freshly ground black pepper
- 1/2 teaspoon apple cider vinegar or lemon juice (optional)
Instructions
- Place a light-colored saucepan over medium heat.
- Add butter and cook until melted. Continue cooking, swirling, until butter turns golden brown and smells nutty (3–4 minutes).
- Whisk in flour and stir constantly for 1–2 minutes until golden and smooth.
- Slowly add warm broth while whisking to prevent lumps.
- Simmer for 5–7 minutes, whisking, until thickened.
- Stir in salt, pepper, and optional vinegar or lemon juice. Taste and adjust seasoning.
- Serve warm over your favorite dishes.
Notes
- Use a light pan to easily monitor butter browning.
- Whisk continuously when adding broth for a smooth finish.
- Reheat gently and add a splash of broth if needed.