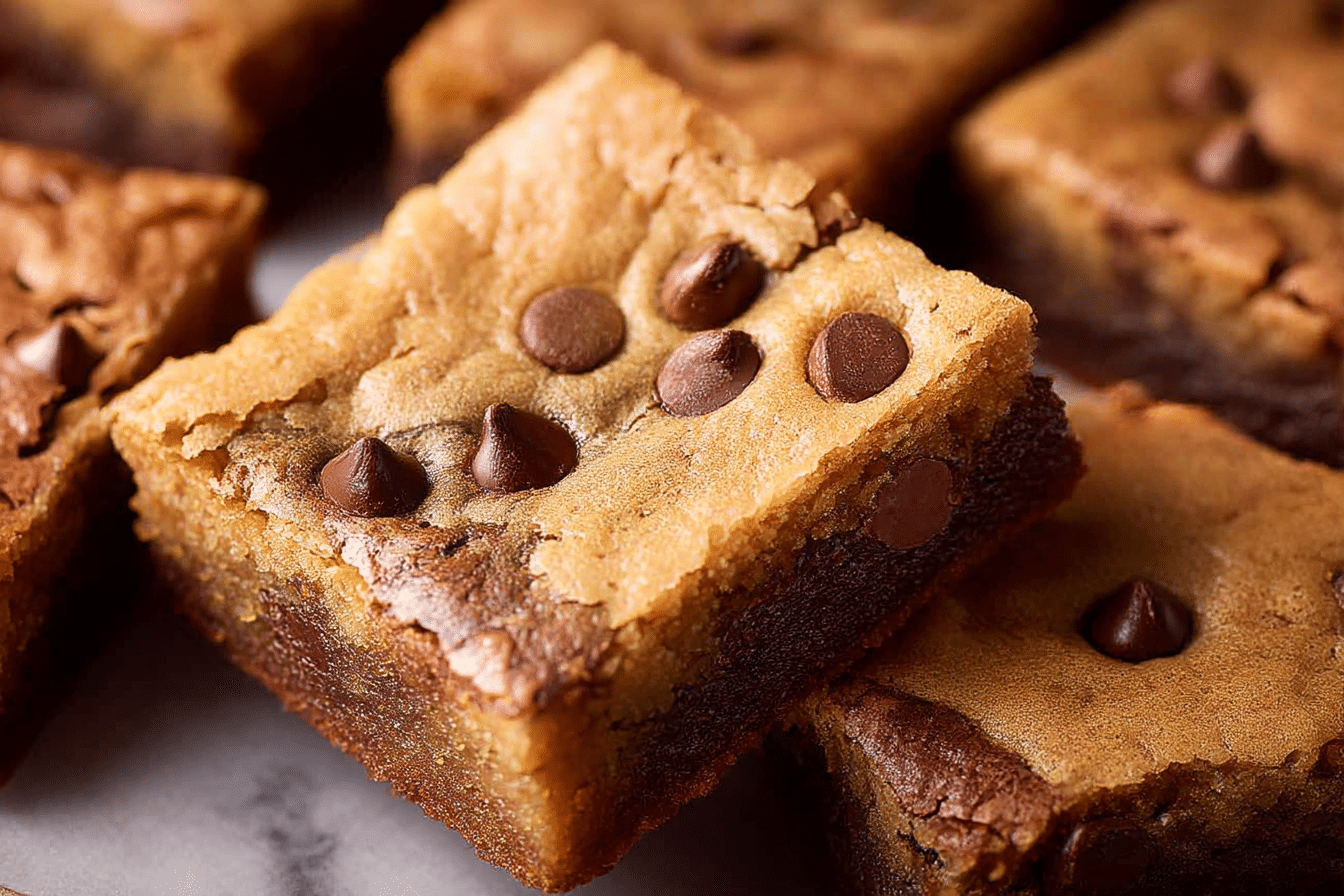
Brookies
When you can’t decide between a soft, gooey brownie and a warm, chewy chocolate chip cookie, why not have both? Brookies bring the best of both worlds into one decadent bite. With fudgy brownie layers meeting golden cookie swirls, each piece is a little adventure in texture, flavor, and sheer indulgence. Let me tell you, it’s worth every bite.
Behind the Recipe
This recipe was born out of indecision — a craving for something rich and chocolaty, but also buttery and crisp-edged. One evening, as I reached for both the brownie and cookie mix, a lightbulb went off. Instead of choosing, I layered the two, baked them together, and Brookies were born in my kitchen. The result was a beautiful mess of chocolate dreams come true.
Recipe Origin or Trivia
The term “Brookie” is a playful mash-up of “brownie” and “cookie.” Though it sounds modern, this dessert has roots in American bake sales and family kitchens where creativity often meant combining leftovers or crowd favorites. Over the years, it’s become a bakery staple, often showing up in cafes as bars, squares, or even deep-dish treats. It’s the sweet equivalent of having your cake and eating it too.
Why You’ll Love Brookies
These are more than just a treat — they’re a full-blown chocolate experience. Here’s what makes them irresistible:
Versatile: Make them as bars, cups, or even in a cast iron skillet for a cookie-brownie pie.
Budget-Friendly: Uses pantry staples and skips the need for fancy ingredients.
Quick and Easy: Two doughs, one pan, and no frosting needed — just bake and go.
Customizable: Add nuts, swap chocolate types, or toss in sprinkles for flair.
Crowd-Pleasing: A guaranteed hit with kids and adults alike.
Make-Ahead Friendly: Both doughs can be made ahead and chilled.
Great for Leftovers: Stays chewy and rich for days — if they last that long!
PrintBrookies
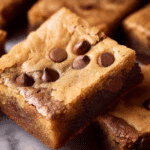
Brookies combine the best of both desserts — rich, fudgy brownie layers swirled with golden, chewy chocolate chip cookie dough. It’s the ultimate treat when you can’t decide between two favorites.
- Prep Time: 20 minutes
- Cook Time: 35 minutes
- Total Time: 55 minutes
- Yield: 16 bars
- Category: Dessert
- Method: Baking
- Cuisine: American
- Diet: Vegetarian
Ingredients
- All-Purpose Flour: 2 1/4 cups (divided)
- Unsalted Butter: 1 cup (softened for cookie dough, melted for brownie batter)
- Granulated Sugar: 1 cup (1/2 cup for each dough)
- Brown Sugar: 1 cup (for cookie dough)
- Eggs: 3 large (1 for cookie, 2 for brownie)
- Vanilla Extract: 2 teaspoons (1 for each dough)
- Baking Soda: 1/2 teaspoon
- Salt: 1/2 teaspoon
- Cocoa Powder: 1/2 cup (unsweetened)
- Chocolate Chips: 1 1/2 cups (1 cup for cookie, 1/2 cup for brownie)
- Dark Chocolate (optional): 4 oz, chopped (in brownie batter)
Instructions
- Preheat Your Equipment: Preheat oven to 350°F (175°C) and line a 9×13 inch pan with parchment paper.
- Combine Ingredients: For cookie dough: cream softened butter with both sugars, add egg and vanilla, then stir in flour, baking soda, salt, and chocolate chips.
- Prepare Your Cooking Vessel: For brownie layer: whisk melted butter with sugar and cocoa powder, then add eggs and vanilla. Stir in flour, salt, and chocolate.
- Assemble the Dish: Press cookie dough into the pan, then spread brownie batter over the top.
- Cook to Perfection: Bake for 30–35 minutes, until the top is set and a toothpick comes out with moist crumbs.
- Finishing Touches: Let cool in the pan for 20 minutes, then lift out and let cool completely.
- Serve and Enjoy: Slice into squares and serve warm or at room temperature.
Notes
- Chill doughs for 15–20 minutes before layering for best texture.
- Let cool fully before slicing for clean bars.
- Store in airtight container to maintain softness.
Nutrition
- Serving Size: 1 bar
- Calories: 310
- Sugar: 26g
- Sodium: 160mg
- Fat: 18g
- Saturated Fat: 10g
- Unsaturated Fat: 7g
- Trans Fat: 0g
- Carbohydrates: 36g
- Fiber: 2g
- Protein: 3g
- Cholesterol: 55mg
Chef’s Pro Tips for Perfect Results
Let’s make sure your Brookies come out perfect every time:
- Chill both doughs for 15–20 minutes before layering for easier handling.
- Don’t overmix either batter — keep the textures tender and fudgy.
- Use room temperature butter and eggs for smoother batters.
- Bake just until edges are golden and center is slightly soft — they’ll continue cooking as they cool.
- Let cool completely before slicing to get those clean, layered squares.
Kitchen Tools You’ll Need
Gather your gear before diving in — you don’t need much, but each piece helps:
Mixing Bowls: One for the brownie batter, one for the cookie dough.
Electric Mixer or Whisk: Helps get a smooth, creamy consistency.
Rubber Spatula: Ideal for folding in chocolate chips and scraping bowls clean.
Measuring Cups and Spoons: Precision keeps the balance of both layers just right.
9×13 Baking Pan: The perfect size for thick, layered Brookies.
Parchment Paper: Makes lifting and slicing a breeze.
Ingredients in Brookies
Each layer of a Brookie plays its part in creating that perfect bite. Here’s what you’ll need:
- All-Purpose Flour: 2 1/4 cups (divided). Provides structure for both batters.
- Unsalted Butter: 1 cup (softened for cookie dough, melted for brownie batter). Adds richness and flavor.
- Granulated Sugar: 1 cup (1/2 cup for each dough). Sweetens and balances moisture.
- Brown Sugar: 1 cup (for cookie dough). Brings moisture and a hint of caramel flavor.
- Eggs: 3 large (1 for cookie, 2 for brownie). Binds ingredients and adds richness.
- Vanilla Extract: 2 teaspoons (1 for each dough). Boosts the chocolate and cookie notes.
- Baking Soda: 1/2 teaspoon. Helps the cookie layer rise.
- Salt: 1/2 teaspoon. Balances sweetness and enhances flavor.
- Cocoa Powder: 1/2 cup (unsweetened). The base of your brownie flavor.
- Chocolate Chips: 1 1/2 cups (1 cup for cookie, 1/2 cup for brownie). Brings melty pockets of joy.
- Dark Chocolate (optional): 4 oz, chopped (in brownie batter). Adds a deeper chocolate hit.
Ingredient Substitutions
Let’s say your pantry’s missing something — here’s how to swap smartly:
All-Purpose Flour: Use 1:1 gluten-free flour blend.
Butter: Substitute with coconut oil or plant-based butter.
Granulated Sugar: Replace with coconut sugar or monk fruit sweetener.
Eggs: Use flax eggs or applesauce for an egg-free version.
Chocolate Chips: Try white, milk, or peanut butter chips.
Ingredient Spotlight
Brown Sugar: More than sweetness, it adds moisture and chew, giving that cookie layer its irresistible texture.
Cocoa Powder: The soul of the brownie base, this ingredient gives rich, deep flavor when paired with real chocolate chunks.

Instructions for Making Brookies
Now let’s bring these two classic treats together into one epic dessert bar. Here are the steps you’re going to follow:
- Preheat Your Equipment:
Preheat your oven to 350°F (175°C). Line a 9×13 inch pan with parchment paper. - Combine Ingredients:
Prepare the cookie dough by creaming softened butter with both sugars. Add egg and vanilla, then mix in flour, baking soda, salt, and chocolate chips. - Prepare Your Cooking Vessel:
In a separate bowl, whisk melted butter with sugar and cocoa powder for the brownie layer. Add eggs and vanilla, then fold in flour, salt, and chocolate. - Assemble the Dish:
Press the cookie dough into the bottom of the pan in an even layer. Gently spread brownie batter over it. - Cook to Perfection:
Bake for 30–35 minutes until the top is set and a toothpick comes out with moist crumbs. - Finishing Touches:
Let cool in the pan for 20 minutes, then lift out and cool completely on a rack. - Serve and Enjoy:
Slice into squares and dig in — warm or at room temp, they’re a total treat.
Texture & Flavor Secrets
Brookies are all about contrast. The cookie layer is chewy, buttery, and golden-edged. The brownie layer? Fudgy, dense, and deeply chocolaty. Together, you get sweet crunch, soft bite, and melty chocolate all in one mouthful — a harmony of textures that keeps you reaching for more.
Cooking Tips & Tricks
Here’s how to take your Brookies to the next level:
- Use a metal pan for more even baking than glass.
- Lightly dampen your hands to press cookie dough evenly.
- Swirl the layers slightly for a marbled effect.
- For neat slices, chill before cutting with a sharp knife.
What to Avoid
Let’s dodge a few easy mistakes:
- Overbaking: Makes them dry. Pull them when they’re still a bit soft in the center.
- Skipping parchment: Makes removal and cutting messy.
- Hot batter: Don’t add eggs to hot butter or you’ll scramble them.
- Uneven layers: Use a spatula to spread each layer flat.
Nutrition Facts
Servings: 16 bars
Calories per serving: Approximately 310
Note: These are approximate values.
Preparation Time
Prep Time: 20 minutes
Cook Time: 35 minutes
Total Time: 55 minutes
Make-Ahead and Storage Tips
Brookies are incredibly make-ahead friendly. You can prepare both layers, refrigerate for up to 24 hours, and bake when ready. Baked Brookies store well in an airtight container for up to 4 days. Freeze for up to 2 months — just thaw at room temperature or microwave for 15 seconds to enjoy warm.
How to Serve Brookies
Serve them as-is, or get creative! Warm them up and top with a scoop of vanilla ice cream, a drizzle of chocolate sauce, or a dusting of powdered sugar. They’re also great with coffee or milk.
Creative Leftover Transformations
Leftovers? Here’s how to reinvent them:
- Ice Cream Sandwiches: Slice and sandwich with vanilla or chocolate ice cream.
- Brookie Trifle: Layer with whipped cream and berries in a glass for dessert cups.
- Crumbled Topping: Use on yogurt, oatmeal, or milkshakes.
Additional Tips
- Use an offset spatula for cleaner layers.
- For bakery-style edges, slightly underbake and let cool in pan.
- Add a pinch of espresso powder to enhance chocolate flavor.
Make It a Showstopper
Presentation counts! Cut Brookies into perfect squares, stack them high on a white platter, and sprinkle with a touch of flaky sea salt or cocoa powder. Wrap in parchment and twine for a sweet gift.
Variations to Try
- Peanut Butter Brookies: Swirl in peanut butter into the brownie layer.
- Nutty Brookies: Add chopped pecans or walnuts for crunch.
- Red Velvet Brookies: Use red velvet cookie dough for a festive look.
- S’mores Brookies: Top with mini marshmallows and graham crumbs.
- Blondie Brookies: Replace brownie with a blondie layer for a butterscotch vibe.
FAQ’s
Q1: Can I use boxed mixes?
A1: Yes! Use your favorite brownie and cookie mix to save time.
Q2: How do I keep them soft?
A2: Store in an airtight container and avoid overbaking.
Q3: Can I freeze Brookies?
A3: Absolutely. Wrap tightly and freeze for up to 2 months.
Q4: Are they supposed to be gooey in the center?
A4: Yes! Slightly underbaked centers keep them soft and fudgy.
Q5: Can I make them gluten-free?
A5: Use a 1:1 gluten-free flour blend for both layers.
Q6: What’s the best way to reheat?
A6: Microwave for 10–15 seconds for that fresh-from-the-oven warmth.
Q7: Can I bake them in muffin tins?
A7: Yes, just reduce the baking time to about 20–25 minutes.
Q8: Do I need to chill the dough?
A8: It’s optional but helps with easier layering and better texture.
Q9: How do I get clean slices?
A9: Let cool fully and use a sharp knife wiped clean between cuts.
Q10: Can I reduce the sugar?
A10: Yes, reduce by 1/4 cup in each layer without losing structure.
Conclusion
Brookies are the ultimate dessert mashup — chewy, fudgy, chocolate-packed, and absolutely addictive. Whether you’re making them for a party, a lunchbox treat, or just because you need something sweet, they never disappoint. Trust me, this one’s a total game-changer.