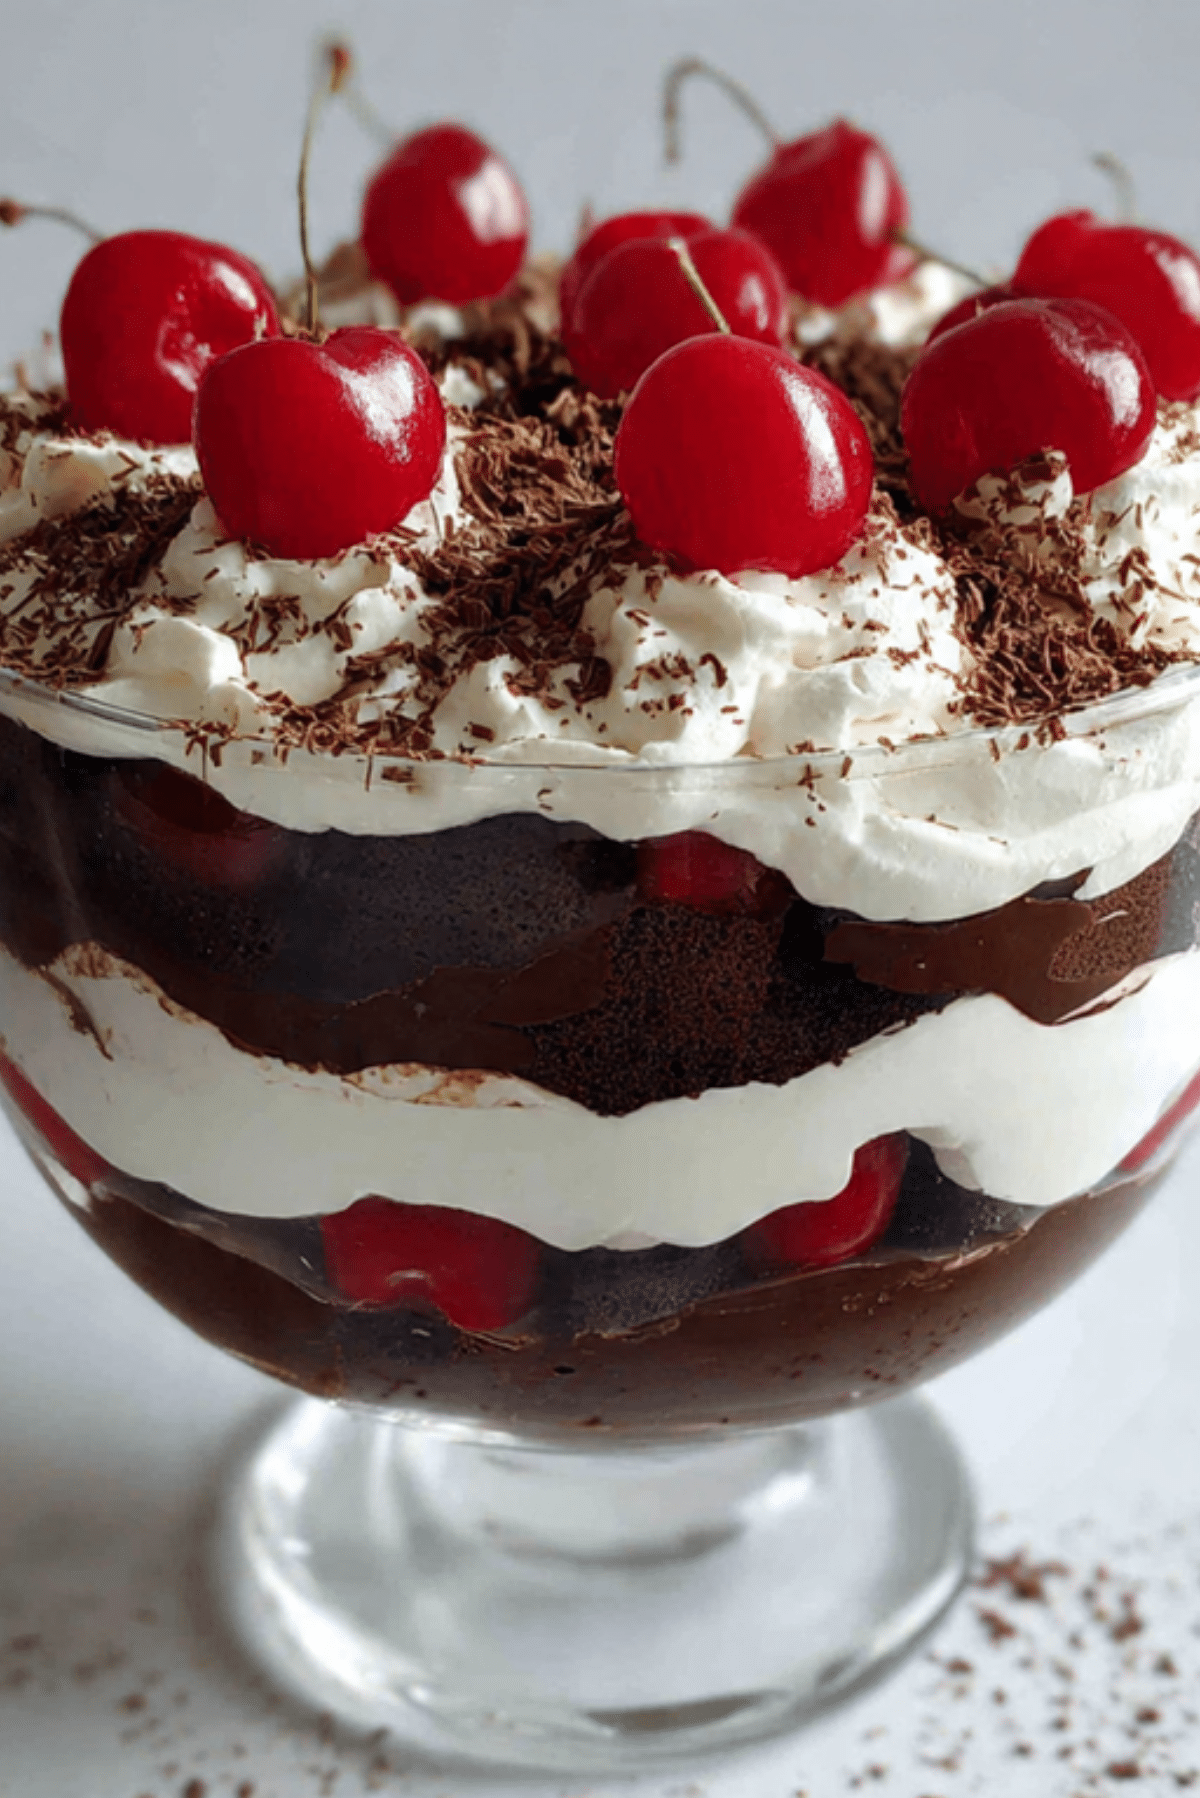
Black Forest Trifle
This dessert is a showstopping centerpiece that brings together all the classic flavors of a traditional cake but in a much simpler, layered format. Trust me, you are going to love this because it looks incredibly fancy but requires very little actual effort to assemble.
The Story of a Classic Flavor Combination
The Black Forest profile originates from the mountain regions of Germany, where cherries and chocolate have been paired for generations. While the traditional cake version can be a bit intimidating to bake and frost, this trifle version makes those iconic flavors accessible to any home cook.
Why This Trifle is a Total Game-Changer
Let me tell you, it is worth every bite, especially when you see how quickly it disappears at a party.
Versatile: You can make one giant bowl for a party or serve them in individual mason jars for a rustic look.
Budget-Friendly: Using a simple cake base and canned or frozen cherries keeps the cost down while maintaining high quality.
Quick and Easy: Since there is no complicated frosting or layering required, you can put this together in under thirty minutes.
Customizable: You can easily swap the type of chocolate used or add extra fruit if you want to experiment.
Crowd-Pleasing: Chocolate and cherries are a universal favorite that rarely fails to impress a room full of guests.
Make-Ahead Friendly: This actually benefits from sitting in the fridge for a few hours as the cake soaks up all the delicious juices.
Great for Leftovers: It stays delicious and moist in the refrigerator for a couple of days after serving.
Secrets for the Perfect Dessert Layers
The key to a great trifle is ensuring your cake pieces are the right size so they can absorb the cherry syrup without becoming complete mush. I recommend cutting the cake into uniform cubes rather than just crumbling it. Also, make sure your whipped cream is beaten to stiff peaks so the layers stay distinct and do not bleed into each other too quickly.
Essential Tools for This Recipe
- Large Glass Trifle Bowl: A clear bowl is essential so everyone can see the beautiful layers of chocolate and cream.
- Rubber Spatula: This is the best tool for folding your whipped cream and spreading it evenly to the edges of the glass.
- Large Serrated Knife: Use this to cut your chocolate cake into clean, even cubes without crushing the airy texture.
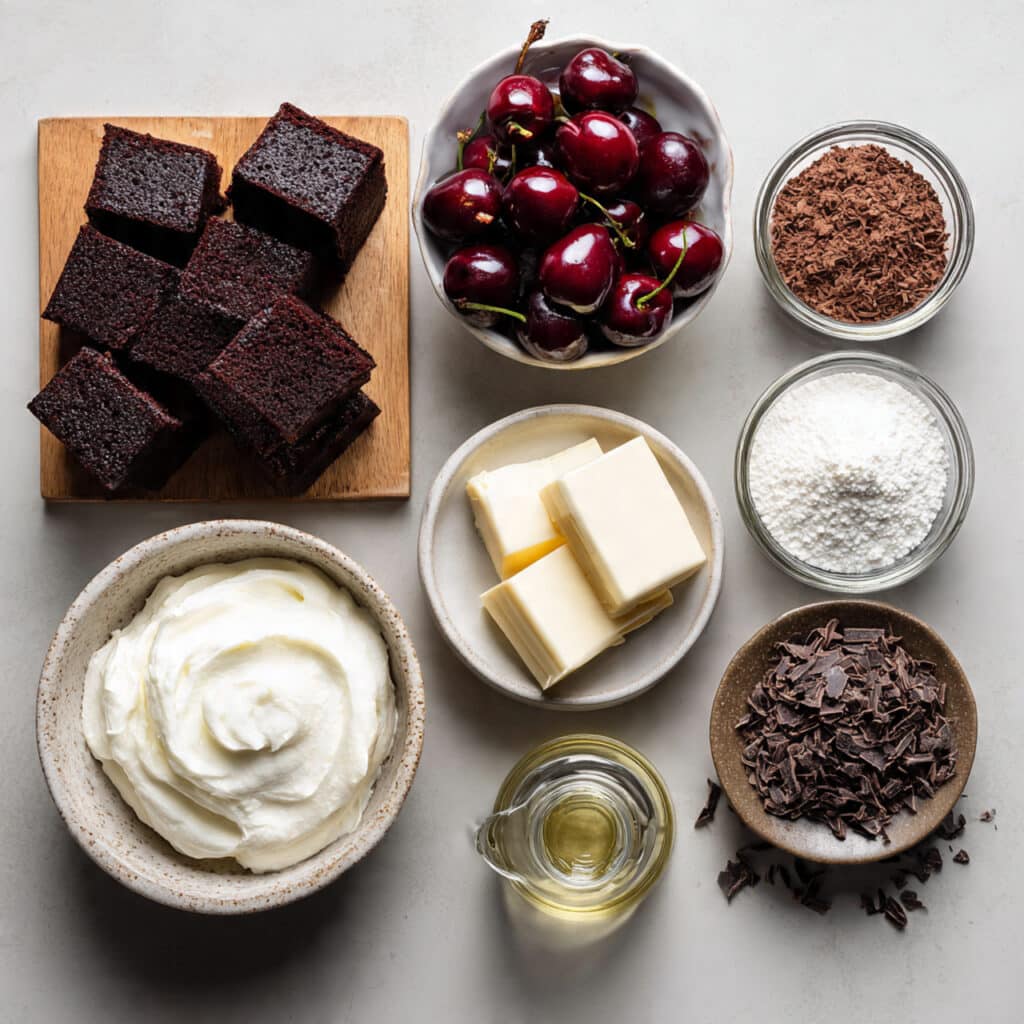
Ingredients You Will Need For This Recipe
- Chocolate Sponge Cake: 1 large cake. This serves as the rich, cocoa-infused foundation of the dessert.
- Dark Sweet Cherries: 2 cans or 3 cups. These provide the essential tartness and juicy texture that balances the chocolate.
- Heavy Whipping Cream: 3 cups. When whipped, this creates the light and airy layers that give the trifle its height.
- Powdered Sugar: 0.5 cups. This sweetens the cream without making it feel grainy or heavy.
- Vanilla Extract: 2 teaspoons. A touch of vanilla adds depth to the cream and rounds out the chocolate notes.
- Chocolate Shavings: 0.5 cups. These are sprinkled on top for a professional finish and a bit of extra crunch.
- Cherry Juice: 0.25 cups. A small amount is drizzled over the cake to ensure every bite is moist and flavorful.
Easy Ingredient Substitutions
Chocolate Cake: You can use chocolate brownies if you want a denser and more indulgent texture.
Cherries: If you cannot find dark sweet cherries, tart red cherries with a little extra sugar will work perfectly.
Cream: For a lighter version, you can use a combination of whipped cream and Greek yogurt.
Key Ingredients to Watch
Dark Cherries: These are the heart of the dish, providing that deep red color and the burst of fruitiness in every spoonful.
Heavy Cream: The quality of your cream determines the stability of the trifle, so make sure it is very cold before whipping.
Let Us Get Assembling
- Preheat Your Equipment: While there is no baking for the assembly, ensure your mixing bowl for the cream is chilled in the freezer for ten minutes.
- Combine Ingredients: Whip the heavy cream, powdered sugar, and vanilla together until stiff peaks form.
- Prepare Your Cooking Vessel: Place your clean glass trifle bowl on a flat surface where you have plenty of room to work.
- Assemble the Dish: Start by placing a layer of chocolate cake cubes at the bottom, followed by a drizzle of cherry juice and a layer of cherries.
- Cook to Perfection: Spread a thick layer of whipped cream over the cherries, ensuring it reaches the glass edges, and repeat the layers until the bowl is full.
- Finishing Touches: Top the final layer of cream with a generous amount of chocolate shavings and a few reserved whole cherries.
- Serve and Enjoy: Chill for at least two hours before serving to let the flavors develop their full potential.
Texture and Flavor Development
This dessert is all about the contrast between the moist, slightly dense chocolate cake and the light, cloud-like whipped cream. The cherries provide a refreshing burst of acidity that cuts through the richness of the cocoa, creating a balanced flavor profile that keeps you coming back for another spoonful.
Expert Cooking Tips and Tricks
- Always push your cream and fruit layers all the way to the side of the glass so the layers are visible from the outside.
- If you want a deeper chocolate flavor, lightly soak the cake cubes in a mixture of cherry juice and a tablespoon of cocoa powder.
- Use a vegetable peeler on a room-temperature chocolate bar to get those perfect, curly chocolate shavings for the top.
Common Pitfalls to Avoid
- Using Warm Cake: Make sure your cake is completely cool before layering, or it will melt the whipped cream.
- Over-soaking: Do not add too much liquid to the cake layers or the bottom of the trifle will become soggy.
- Skipping the Chill Time: This dessert really needs time in the fridge for the structure to set and the flavors to meld.
Trifle Nutrition Facts
Servings: 10
Calories per serving: 345
Note: These are approximate values.
Total Timing Breakdown
Prep Time: 25 minutes
Cook Time: 0 minutes
Total Time: 25 minutes
Storage and Make Ahead Advice
You can assemble this trifle up to twenty-four hours in advance, which actually makes it a perfect stress-free dessert for hosting. Keep it covered with plastic wrap in the refrigerator. It is not recommended to freeze this dish as the cream and fruit texture will change significantly upon thawing.
How to Serve Your Trifle
Use a large, long-handled spoon to scoop deep into the bowl so every guest gets a bit of every single layer in their serving. It looks beautiful served alongside a small plate of fresh berries or a sprig of mint.
Creative Leftover Transformations
If you have leftovers, you can scoop them into small glasses and top with a bit of granola for a decadent breakfast parfait. You could also blend a small portion into a milkshake for a Black Forest themed treat.
Additional Pro Advice
To make the layers even more distinct, you can add a thin layer of chocolate ganache or chocolate pudding between the cake and the cherries. This adds another level of indulgence that chocolate lovers will absolutely adore.
Make It a Showstopper
For an extra elegant look, use a piping bag to create beautiful swirls of cream on the top layer instead of just spreading it flat. A light dusting of cocoa powder through a stencil can also add a professional touch.
Creative Variations to Try
- White Forest Trifle: Use vanilla sponge cake and white chocolate shavings instead of dark chocolate.
- Berry Blast: Swap the cherries for a mix of raspberries and blackberries for a different fruit profile.
- Mocha Twist: Add a teaspoon of instant espresso powder to the whipped cream for a coffee-flavored kick.
FAQ’s
Q1. Can I use store-bought cake?
A1. Absolutely, a store-bought chocolate pound cake or sponge cake works perfectly and saves a lot of time.
Q2. Is it okay to use frozen cherries?
A2. Yes, just make sure to thaw them completely and drain the excess liquid before using them in the layers.
Q3. How long will this last in the fridge?
A3. It is best enjoyed within two days, as the cream will eventually start to deflate.
Q4. Can I make this dairy-free?
A4. You can use a chilled can of coconut cream whipped with powdered sugar as a great dairy-free substitute.
Q5. What if I do not have a trifle bowl?
A5. Any large glass salad bowl or even individual clear glasses will work just as well for showing off the layers.
Q6. Should I sweeten the cherries?
A6. If you are using tart cherries, you might want to toss them with a tablespoon of sugar before layering.
Q7. Can I use chocolate pudding instead of cream?
A7. You can certainly add layers of chocolate pudding, but I recommend still using some whipped cream to keep it light.
Q8. How do I get clean chocolate shavings?
A8. Use a room-temperature chocolate bar and a vegetable peeler for curls, or a grater for fine flakes.
Q9. Can I add nuts?
A9. Toasted slivered almonds add a great crunch that complements the cherry and chocolate flavors perfectly.
Q10. Why is my whipped cream runny?
A10. Ensure the cream is very cold and your bowl is clean. If it is still runny, keep whipping until it holds its shape.
Conclusion
This Black Forest Trifle is the perfect blend of simplicity and elegance. It captures the heart of a classic dessert while being easy enough for any weeknight or special occasion, and I know it will be a huge hit with your friends and family.
PrintBlack Forest Trifle
A stunning layered dessert featuring rich chocolate cake, juicy dark cherries, and cloud-like whipped cream for a simple take on a German classic.
Ingredients
- 1 large Chocolate Sponge Cake
- 3 cups Dark Sweet Cherries
- 3 cups Heavy Whipping Cream
- 0.5 cup Powdered Sugar
- 2 tsp Vanilla Extract
- 0.5 cup Chocolate Shavings
- 0.25 cup Cherry Juice
Instructions
- Chill your mixing bowl and beaters in the freezer for 10 minutes before starting.
- Cut the chocolate sponge cake into uniform 1-inch cubes.
- In the chilled bowl, whip the heavy cream, powdered sugar, and vanilla extract until stiff peaks form.
- Place a layer of cake cubes at the bottom of a glass trifle bowl and drizzle with a little cherry juice.
- Add a generous layer of cherries over the cake.
- Spread a layer of whipped cream over the cherries, making sure it touches the sides of the bowl.
- Repeat the cake, juice, cherry, and cream layers until the bowl is filled, ending with cream.
- Garnish the top with chocolate shavings and a few reserved cherries.
- Refrigerate for at least 2 hours before serving.
Notes
- Cut the cake into cubes rather than crumbling for better texture.
- Always spread the layers to the edge of the glass for a beautiful visual effect.
- Best served cold to keep the whipped cream stable.