Best Dutch Apple Pie
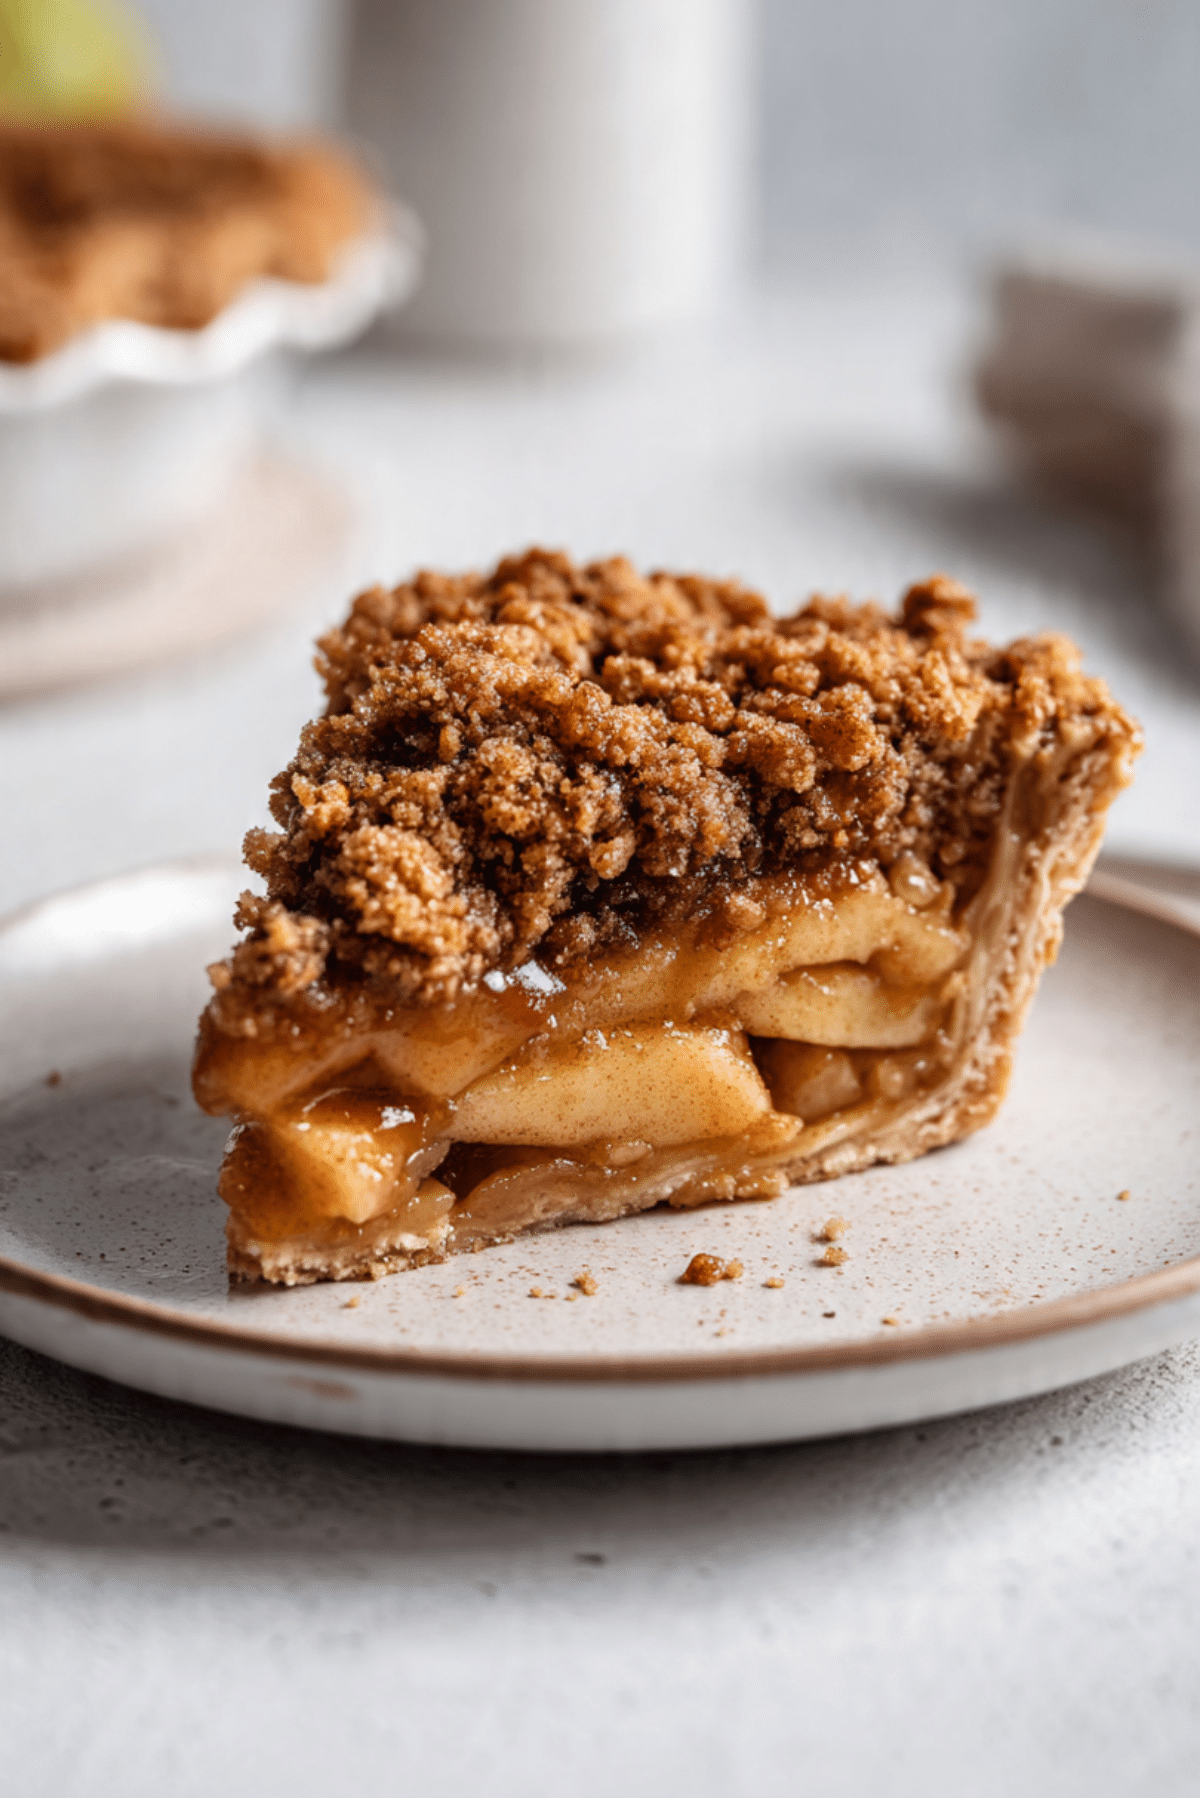
There is something incredibly comforting about a slice of Dutch apple pie, especially when the apples are soft and cinnamon-spiced, the filling is glossy and warm, and the crumb topping is buttery and golden. This is the kind of dessert that fills the house with an aroma that makes everyone wander into the kitchen. Trust me, you’re going to love this because it feels classic, cozy, and absolutely worth every bite.
Why This Dutch Apple Pie Always Steals the Show
This pie has that perfect balance of textures and flavors. The tender apples melt into a rich filling, while the crumb topping adds a sweet, slightly crisp contrast. It feels homemade in the best way and delivers that bakery-style experience right from your own oven.
A Bit of History Behind Dutch Apple Pie
Dutch apple pie is known for its signature crumb topping instead of a traditional top crust. This style became popular for its simplicity and texture, offering a buttery topping that soaks up the apple juices as it bakes. Over time, it became a favorite at family gatherings and holidays, especially when comfort desserts are most welcome.
Why This Recipe Is One You Can Trust
Before we start baking, let’s talk about why this recipe works so well every single time.
Versatile: Perfect for holidays, weekends, or whenever you crave a cozy dessert.
Budget-Friendly: Uses simple, affordable ingredients.
Quick and Easy: Straightforward steps with reliable results.
Customizable: Easy to adjust spices or sweetness.
Crowd-Pleasing: A guaranteed hit with all ages.
Make-Ahead Friendly: Can be baked in advance without losing quality.
Great for Leftovers: Tastes amazing even the next day.
Baker-Approved Tips for the Best Results
Now let’s dive into a few expert tips that make this pie truly special.
- Use a mix of apples for balanced flavor and texture.
- Slice apples evenly so they bake consistently.
- Chill the crumb topping briefly if your kitchen is warm.
- Let the pie rest before slicing so it sets properly.
Kitchen Tools You Will Need
Having the right tools makes the baking process smooth and enjoyable.
Pie Dish: A standard 9-inch dish works perfectly.
Mixing Bowls: Separate bowls for filling and topping.
Pastry Cutter or Fork: Helps create a crumbly topping.
Sharp Knife: For slicing apples evenly.
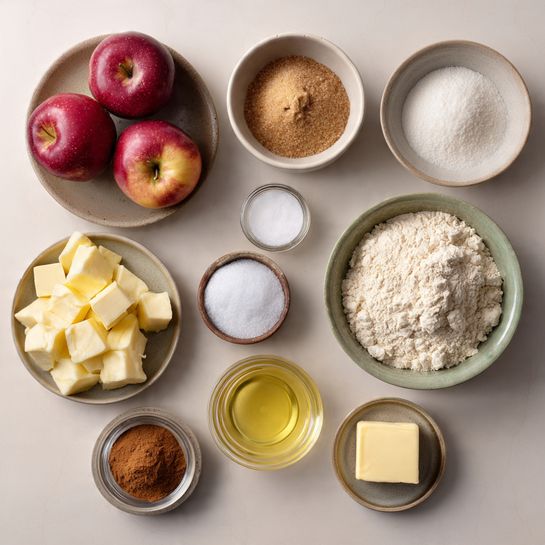
Ingredients You Will Need
Each ingredient works together to create that classic Dutch apple pie flavor and texture.
- Pie Crust: 1 unbaked 9-inch crust, forming the base.
- Apples: 6 cups peeled and sliced, providing the main filling.
- Granulated Sugar: ¾ cup, adding sweetness.
- Brown Sugar: ¼ cup, for depth and warmth.
- All-Purpose Flour: 3 tablespoons, thickening the filling.
- Ground Cinnamon: 2 teaspoons, for classic spice.
- Nutmeg: ¼ teaspoon, adding subtle warmth.
- Lemon Juice: 1 tablespoon, balancing sweetness.
- All-Purpose Flour: ¾ cup, for the crumb topping.
- Brown Sugar: ½ cup, sweetening the topping.
- Unsalted Butter: ½ cup cold and cubed, creating the crumble.
- Salt: ¼ teaspoon, enhancing all flavors.
Easy Ingredient Substitutions
This recipe adapts easily to what you have on hand.
Apples: Use a mix of sweet and tart varieties.
Brown Sugar: Coconut sugar works as an alternative.
Spices: Add a pinch of allspice for extra warmth.
Spotlight on Key Ingredients
Some ingredients truly define this pie.
Apples: The heart of the pie, becoming soft and flavorful as they bake.
Crumb Topping: Adds texture and a buttery finish that sets this pie apart.
Let’s Bake This Pie Together
Now it is time to bring everything together. Follow these steps and enjoy the process.
- Preheat Your Equipment: Preheat the oven to 375°F.
- Combine Ingredients: In a bowl, mix apples, granulated sugar, brown sugar, flour, cinnamon, nutmeg, and lemon juice.
- Prepare Your Cooking Vessel: Place the pie crust into the pie dish.
- Assemble the Dish: Spoon the apple mixture evenly into the crust.
- Cook to Perfection: In another bowl, mix flour, brown sugar, salt, and butter until crumbly, then sprinkle over apples.
- Finishing Touches: Bake until the topping is golden and the filling bubbles.
- Serve and Enjoy: Let cool before slicing and serving.
Texture and Flavor Development
As the pie bakes, the apples soften and release their juices, thickening into a rich filling. The crumb topping absorbs some of that moisture while staying slightly crisp on top, creating layers of flavor and texture in every bite.
Helpful Baking Tips
A few extra tips can make baking even easier.
- Place the pie on a baking sheet to catch drips.
- Cover loosely if the topping browns too fast.
- Cool completely for clean slices.
What to Avoid When Making Dutch Apple Pie
These common mistakes are easy to fix.
- Using apples that are too soft.
- Skipping the resting time after baking.
- Overworking the crumb topping.
Nutrition Facts
Servings: 8
Calories per serving: Approximately 390
Note: These values are approximate.
Preparation Time Breakdown
Prep Time: 25 minutes
Cook Time: 50 minutes
Total Time: 1 hour 15 minutes
Make-Ahead and Storage Tips
This pie can be baked a day ahead and stored covered at room temperature. Refrigerate for longer storage up to four days. Reheat slices gently in the oven for best texture.
How to Serve This Pie
Serve warm or at room temperature. It pairs beautifully with whipped cream or a simple drizzle of sauce if desired.
Creative Leftover Ideas
Leftover slices can be warmed and served for breakfast or chopped and layered into dessert parfaits. Let me tell you, it is worth every bite.
Extra Tips for Success
Choose firm apples for the best structure. Taste the filling before baking and adjust sweetness if needed.
Make It Look Bakery-Perfect
Brush the crust edge lightly with milk before baking for color. A golden crumb topping makes this pie irresistible.
Variations to Try
- Add chopped nuts to the topping.
- Mix in dried fruit for extra texture.
- Use a blend of spices for deeper flavor.
- Make mini pies for individual servings.
FAQ’s
1. What apples work best?
Firm baking apples are ideal.
2. Can I make this ahead?
Yes, it keeps well for several days.
3. How do I prevent a soggy crust?
Use a thick filling and bake fully.
4. Can I freeze the pie?
Yes, wrap tightly and freeze baked.
5. Should I peel the apples?
Yes, for the best texture.
6. Why is my topping dry?
It may need more butter.
7. Can I reduce the sugar?
Yes, slightly without affecting structure.
8. Does it need refrigeration?
Only after the first day.
9. Can I use store-bought crust?
Yes, it works well.
10. How do I know it is done?
The filling should bubble and topping be golden.
Conclusion
This Dutch apple pie is a total game-changer for anyone who loves classic desserts done right. Cozy, flavorful, and deeply satisfying, it is the kind of recipe you come back to again and again. Bake it once, and it just might become your new favorite.
PrintBest Dutch Apple Pie
A classic Dutch apple pie filled with tender cinnamon-spiced apples and finished with a buttery crumb topping that bakes golden and irresistible.
Ingredients
- Unbaked pie crust, 1 (9-inch)
- Apples, 6 cups peeled and sliced
- Granulated sugar, 3/4 cup
- Brown sugar, 1/4 cup
- All-purpose flour, 3 tablespoons
- Ground cinnamon, 2 teaspoons
- Ground nutmeg, 1/4 teaspoon
- Lemon juice, 1 tablespoon
- All-purpose flour, 3/4 cup
- Brown sugar, 1/2 cup
- Unsalted butter, 1/2 cup cold and cubed
- Salt, 1/4 teaspoon
Instructions
- Preheat the oven to 375°F.
- In a large bowl, combine sliced apples, granulated sugar, brown sugar, flour, cinnamon, nutmeg, and lemon juice.
- Place the unbaked pie crust into a 9-inch pie dish.
- Spoon the apple mixture evenly into the crust.
- In another bowl, mix flour, brown sugar, salt, and cold butter until crumbly.
- Sprinkle the crumb topping evenly over the apples.
- Bake until the topping is golden and the filling is bubbling.
- Remove from the oven and let cool before slicing.
Notes
- Use firm apples for the best texture.
- Let the pie cool to allow the filling to set.
- Cover loosely if the topping browns too quickly.