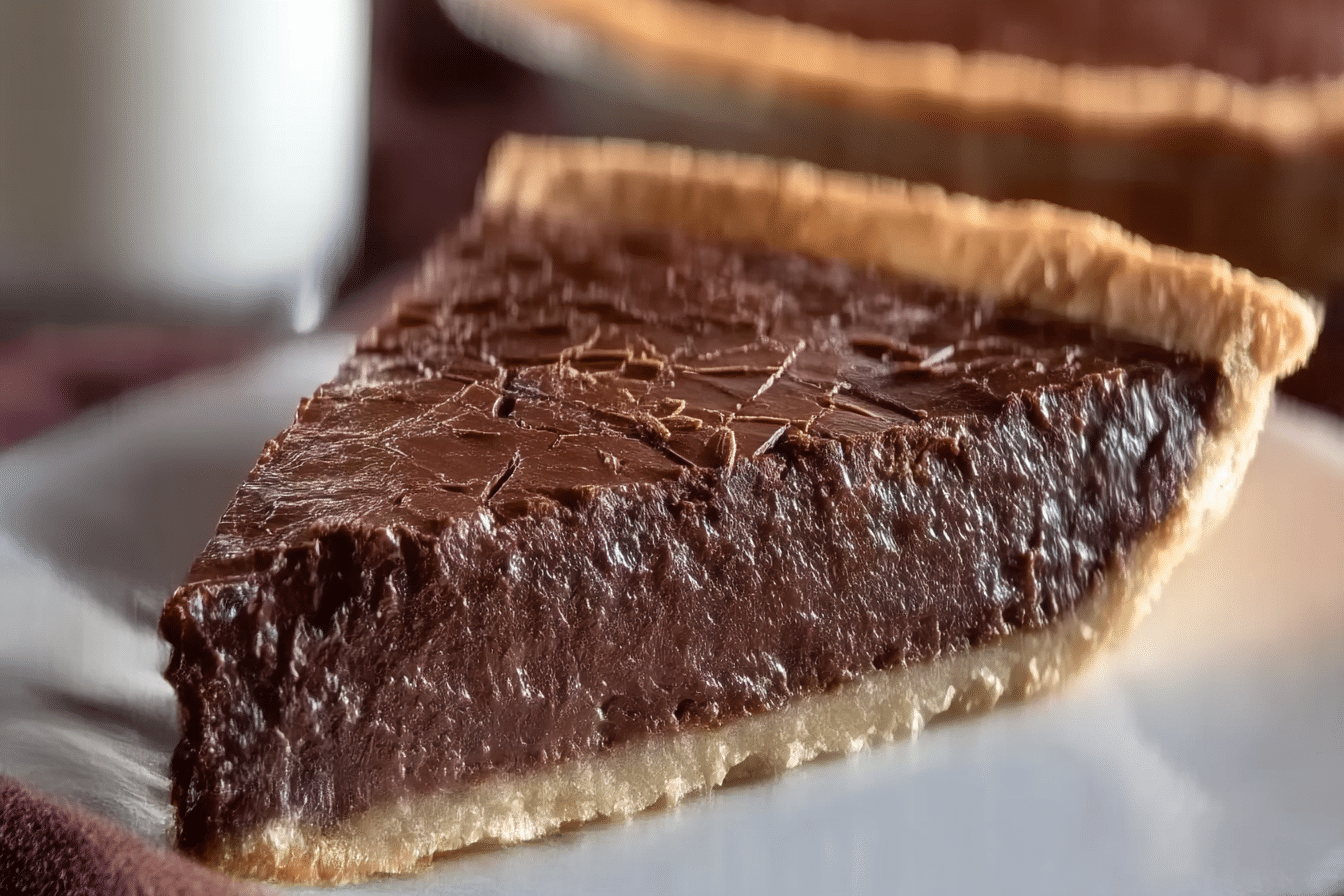
Old-Fashioned Chocolate Pie
There’s a kind of magic in the first bite of an Old-Fashioned Chocolate Pie. That rich, silky filling nestled in a flaky, buttery crust, with its deep cocoa flavor and just the right amount of sweetness, feels like a warm hug from a beloved grandmother. This pie isn’t trendy—it’s timeless. The kind of dessert that speaks to your soul and satisfies every nostalgic craving you didn’t know you had. Let me tell you, it’s worth every bite.
Behind the Recipe
This pie has roots in my childhood, served at every family gathering and holiday meal. It was my grandmother’s specialty—always baked with love and always the first dessert to disappear. Watching her make it was like watching magic. The way she whisked the filling on the stovetop until it thickened, the way the aroma of cocoa filled the kitchen—it all stuck with me. Today, every time I make it, I feel like she’s right there beside me, apron dusted with flour, smiling over my shoulder.
Recipe Origin or Trivia
The Old-Fashioned Chocolate Pie traces back to the American South, where it has graced dinner tables for generations. Originally made with simple pantry staples like cocoa, sugar, and eggs, this pie became a staple of home baking during times when ingredient access was limited. It was a sweet symbol of comfort and creativity. Unlike modern chocolate tarts or mousses, this pie is cooked over the stove and baked just enough to set the filling. It’s old-school in the best way.
Why You’ll Love Old-Fashioned Chocolate Pie
There’s something universally comforting about this dessert. It’s the kind of pie that doesn’t just taste good—it feels good.
Versatile: Perfect for holidays, Sunday dinners, or potlucks. Serve warm, chilled, or room temp.
Budget-Friendly: Made with common ingredients you likely already have.
Quick and Easy: The filling comes together in minutes on the stovetop.
Customizable: Add a pinch of cinnamon or espresso for a fun twist.
Crowd-Pleasing: It vanishes faster than any dessert on the table.
Make-Ahead Friendly: Prepare a day in advance and chill until ready to serve.
Great for Leftovers: A slice the next day might be even better!
PrintOld-Fashioned Chocolate Pie

A rich and nostalgic Old-Fashioned Chocolate Pie with a silky cocoa filling and buttery crust. This timeless Southern dessert brings comfort and indulgence to every bite, perfect for holidays or everyday cravings.
- Prep Time: 15 minutes
- Cook Time: 10 minutes
- Total Time: 25 minutes (+ 4 hours chilling)
- Yield: 8 servings
- Category: Dessert
- Method: Stovetop
- Cuisine: Southern
- Diet: Vegetarian
Ingredients
- Granulated Sugar: 1 cup
- Unsweetened Cocoa Powder: ⅓ cup
- All-Purpose Flour: ¼ cup
- Salt: ¼ teaspoon
- Whole Milk: 2 ½ cups
- Egg Yolks: 3 large
- Unsalted Butter: 2 tablespoons
- Vanilla Extract: 1 ½ teaspoons
- 9-Inch Pie Crust: 1 (baked and cooled)
- Whipped Cream: For topping
Instructions
- Preheat Your Equipment: Ensure the pie crust is pre-baked and cooled.
- Combine Ingredients: In a saucepan, whisk sugar, cocoa, flour, and salt. Gradually whisk in milk and stir in egg yolks.
- Prepare Your Cooking Vessel: Place saucepan over medium heat and whisk until thickened, about 8–10 minutes.
- Assemble the Dish: Remove from heat, stir in butter and vanilla until smooth.
- Cook to Perfection: Strain filling into the crust for smooth texture.
- Finishing Touches: Smooth the top and let cool at room temp, then refrigerate for 4 hours.
- Serve and Enjoy: Top with whipped cream and serve chilled or at room temp.
Notes
- Whisk constantly while cooking to avoid lumps.
- Strain the filling for the smoothest texture.
- Chill thoroughly before slicing for clean cuts.
- Use whole milk for a rich and creamy base.
Nutrition
- Serving Size: 1 slice
- Calories: 320
- Sugar: 28g
- Sodium: 150mg
- Fat: 15g
- Saturated Fat: 7g
- Unsaturated Fat: 6g
- Trans Fat: 0g
- Carbohydrates: 40g
- Fiber: 2g
- Protein: 5g
- Cholesterol: 90mg
Chef’s Pro Tips for Perfect Results
Creating a flawless chocolate pie is easy with a few smart strategies:
- Use whole milk for the richest texture and flavor.
- Whisk constantly while cooking the filling to avoid lumps.
- Strain the filling before pouring it into the crust for extra smoothness.
- Cool completely before slicing for clean, beautiful slices.
- Blind bake the crust to ensure it stays crisp under the creamy filling.
Kitchen Tools You’ll Need
Let’s get your kitchen set up for success with these essentials:
Medium Saucepan: For cooking the luscious filling.
Whisk: Essential for smooth blending and preventing lumps.
Pie Dish: Standard 9-inch works perfectly.
Measuring Cups and Spoons: Accuracy is key to balance.
Fine Mesh Strainer: Optional, but great for an ultra-smooth filling.
Rolling Pin (if using homemade crust): For rolling out that flaky base.
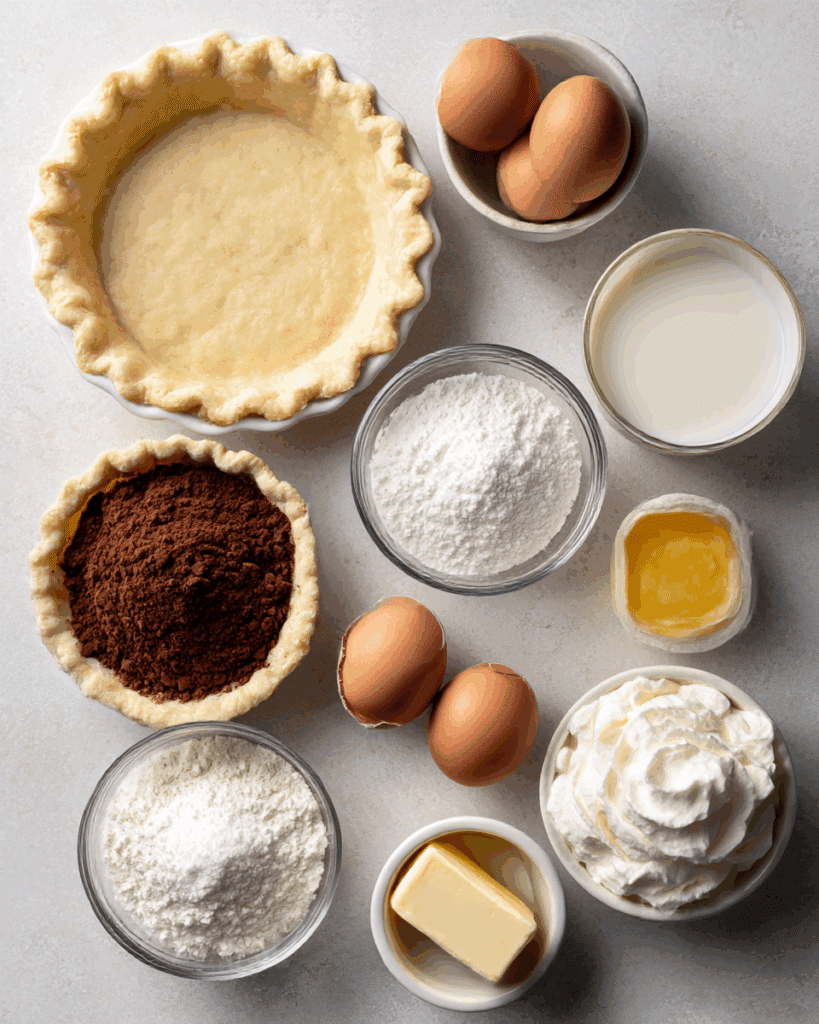
Ingredients in Old-Fashioned Chocolate Pie
This pie comes together through a harmony of humble yet powerful ingredients that create an unforgettable dessert.
- Granulated Sugar: 1 cup. Sweetens the filling and balances the cocoa’s intensity.
- Unsweetened Cocoa Powder: ⅓ cup. Delivers that deep, pure chocolate flavor.
- All-Purpose Flour: ¼ cup. Thickens the filling to that perfect custard consistency.
- Salt: ¼ teaspoon. Enhances the overall flavor and deepens the chocolate notes.
- Whole Milk: 2 ½ cups. Adds richness and helps form the creamy base.
- Egg Yolks: 3 large. Enrich and thicken the filling.
- Unsalted Butter: 2 tablespoons. Adds silkiness and depth.
- Vanilla Extract: 1 ½ teaspoons. Rounds out the flavor beautifully.
- 9-Inch Pie Crust: 1 (baked and cooled). A crisp, flaky foundation for the filling.
- Whipped Cream: For topping. Lightens and balances the dense chocolate flavor.
Ingredient Substitutions
Need a few swaps? Here are some smart substitutions:
Whole Milk: Use 2% or half-and-half for a similar texture.
Cocoa Powder: Dark cocoa powder for a deeper flavor.
Flour: Cornstarch (same amount) for a gluten-free option.
Butter: Plant-based butter works well for a dairy-free version.
Pie Crust: Use a gluten-free or graham cracker crust for variation.
Ingredient Spotlight
Unsweetened Cocoa Powder: The heart of this pie, bringing bold, rich chocolate notes without added sweetness.
Egg Yolks: These add a luxurious texture, creating a custard that’s velvety and satisfying.
Instructions for Making Old-Fashioned Chocolate Pie
Here’s how you’re going to turn those simple ingredients into a slice of pure comfort:
- Preheat Your Equipment:
No need for a hot oven yet, but make sure your pie crust is pre-baked and cooled. - Combine Ingredients:
In a medium saucepan, whisk together sugar, cocoa, flour, and salt. Slowly whisk in the milk, then stir in the egg yolks. - Prepare Your Cooking Vessel:
Place saucepan over medium heat. Whisk continuously until mixture thickens, about 8–10 minutes. - Assemble the Dish:
Once thickened, remove from heat and stir in butter and vanilla until smooth. - Cook to Perfection:
Pour the filling through a fine mesh strainer into the prepared crust for a silky finish. - Finishing Touches:
Smooth the top with a spatula and let cool at room temperature, then refrigerate for at least 4 hours. - Serve and Enjoy:
Slice, top with whipped cream, and enjoy a taste of timeless sweetness.
Texture & Flavor Secrets
The contrast is everything here. The filling is dense yet creamy, rich with cocoa and softened by the buttery crust. The whipped cream brings a light, airy lift. Each bite offers a smooth, luscious texture balanced by the tender, flaky crust and a gentle kiss of vanilla on the finish.
Cooking Tips & Tricks
A few more gems to make your pie pop:
- Blind bake the crust with pie weights for even crispness.
- Use a metal whisk to prevent lumps while cooking the filling.
- Let pie cool completely before refrigerating to avoid condensation.
What to Avoid
To keep things smooth and scrumptious:
- Don’t rush the filling—low and slow thickens best.
- Avoid skipping the strain—it ensures no lumps.
- Don’t refrigerate while hot—it creates a watery top layer.
Nutrition Facts
Servings: 8
Calories per serving: 320
Note: These are approximate values.
Preparation Time
Prep Time: 15 minutes
Cook Time: 10 minutes
Total Time: 25 minutes (+ 4 hours chilling)
Make-Ahead and Storage Tips
This pie is the ultimate make-ahead dessert. Make it the night before, let it chill overnight, and serve the next day for best results. Store tightly covered in the fridge for up to 4 days. For longer storage, freeze individual slices wrapped in plastic and foil for up to 2 months.
How to Serve Old-Fashioned Chocolate Pie
Serve chilled or at room temperature with a generous dollop of whipped cream. Pair with a cup of strong coffee or cold milk. Add a dusting of cocoa or chocolate curls on top for that extra flair.
Creative Leftover Transformations
Yes, this pie is just as good the next day—and even better in creative forms:
- Chocolate Pie Milkshake: Blend a slice with vanilla ice cream.
- Frozen Pie Bites: Freeze slices and dip in chocolate for a frozen treat.
- Layered Dessert Cups: Crumble leftover pie into parfaits with whipped cream and berries.
Additional Tips
- Make it extra decadent by topping with ganache.
- Add a pinch of cinnamon or cayenne for a spicy twist.
- Serve in mini tart shells for individual portions.
Make It a Showstopper
Presentation makes a difference. Use a cake stand, top with piped whipped cream rosettes, sprinkle with chocolate curls or sea salt flakes, and serve with vintage dessert forks for that charming, old-school vibe.
Variations to Try
- Mocha Chocolate Pie: Add a teaspoon of instant espresso to the filling.
- Coconut-Chocolate Pie: Fold in shredded coconut before chilling.
- Peanut Butter Chocolate Pie: Swirl in peanut butter for a nutty kick.
- Salted Caramel Chocolate Pie: Drizzle caramel sauce and sprinkle sea salt before serving.
- Mint Chocolate Pie: Add peppermint extract and garnish with mint leaves.
FAQ’s
Q1: Can I make this pie crustless?
A1: Yes, bake the filling in ramekins for a chocolate custard.
Q2: Can I use a store-bought crust?
A2: Absolutely—it works great and saves time.
Q3: Is this pie freezer-friendly?
A3: Yes, freeze slices individually for up to 2 months.
Q4: Can I make this dairy-free?
A4: Use plant-based milk and butter alternatives.
Q5: What cocoa powder is best?
A5: Use unsweetened natural cocoa for classic flavor.
Q6: Can I serve it warm?
A6: Best served chilled, but slightly warm is also delicious.
Q7: How long does it last?
A7: Up to 4 days in the fridge, tightly covered.
Q8: Is it gluten-free?
A8: Use cornstarch instead of flour and a gluten-free crust.
Q9: Can I use dark chocolate instead of cocoa?
A9: Yes, melt dark chocolate and reduce sugar slightly.
Q10: Why strain the filling?
A10: It removes lumps and creates a smooth, creamy texture.
Conclusion
This Old-Fashioned Chocolate Pie is more than dessert—it’s a memory in every slice. Rich, creamy, and wrapped in nostalgia, it brings warmth to any occasion. Whether you’re making it for family dinner or just because, one bite will transport you to simpler, sweeter times.